New info at the bottom of this page!!
As you are reading this keep in mind that we will make you stainless steel rounds, squares and rectangles any size you choose. Email me for pricing to bkpottery@aol.com
Always allow for the 1/8” fiber in your sizing. Our measurements are outside to outside of the stainless!
Great way to use scrap glass.
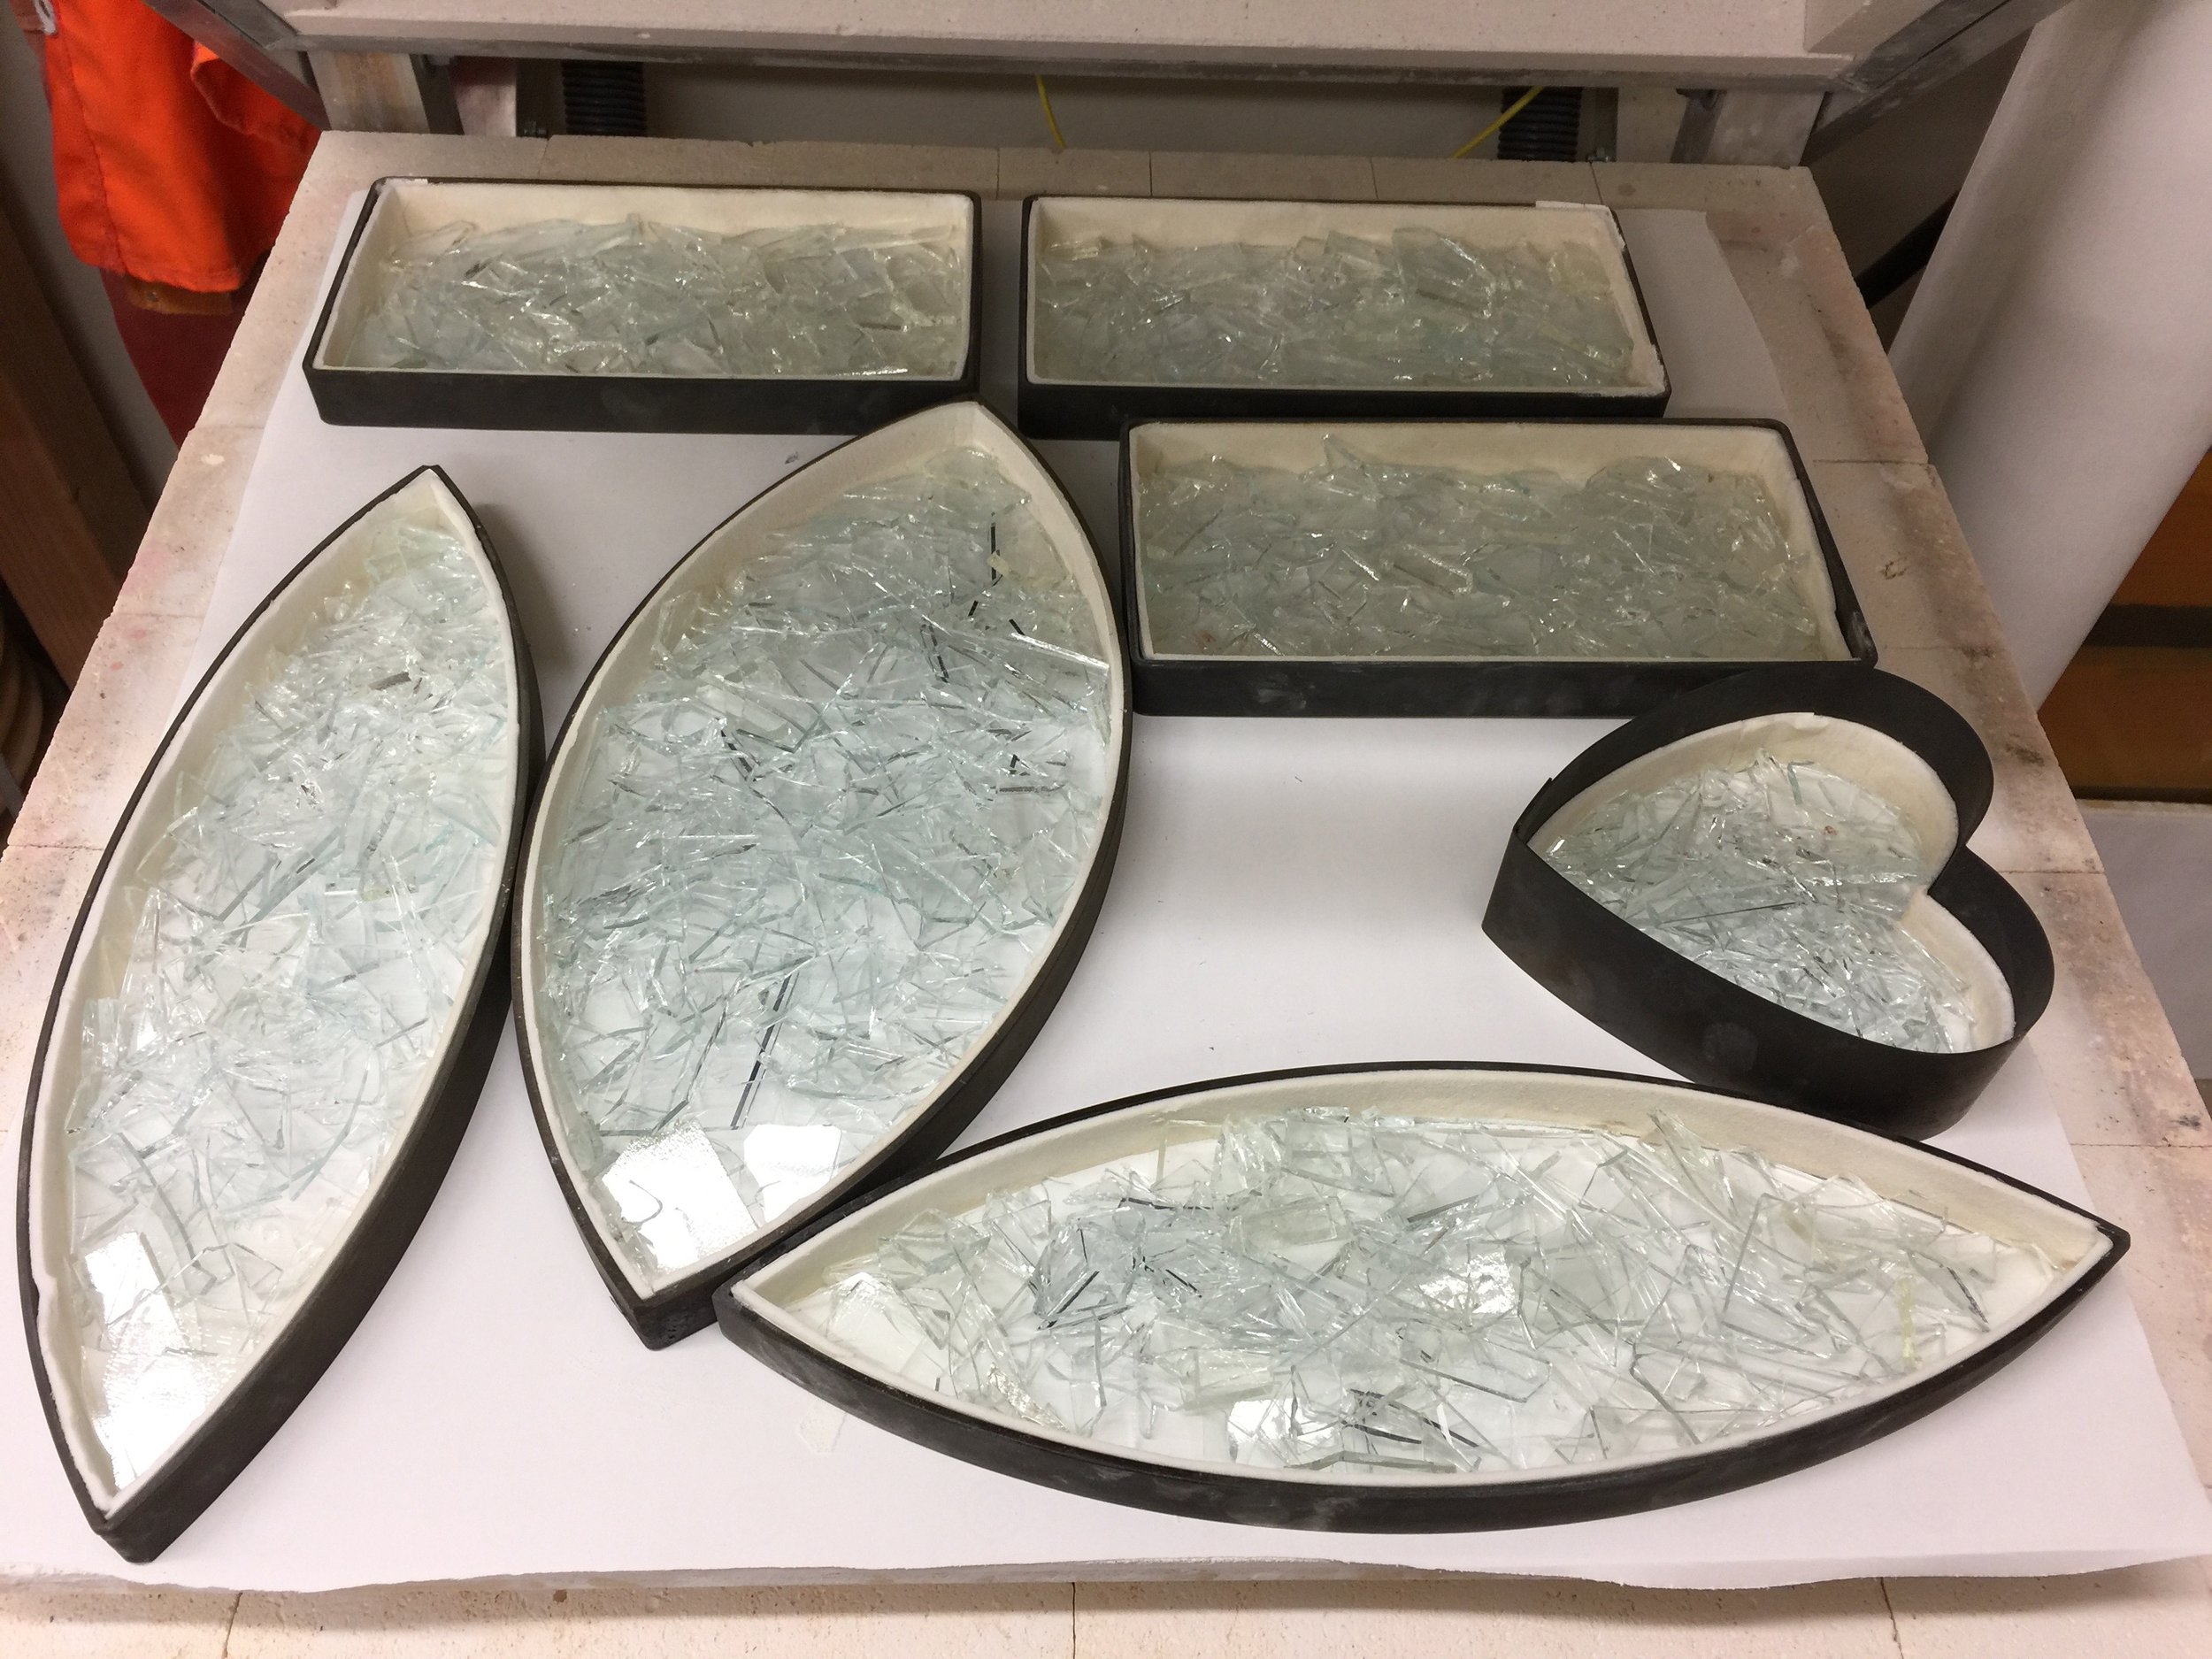
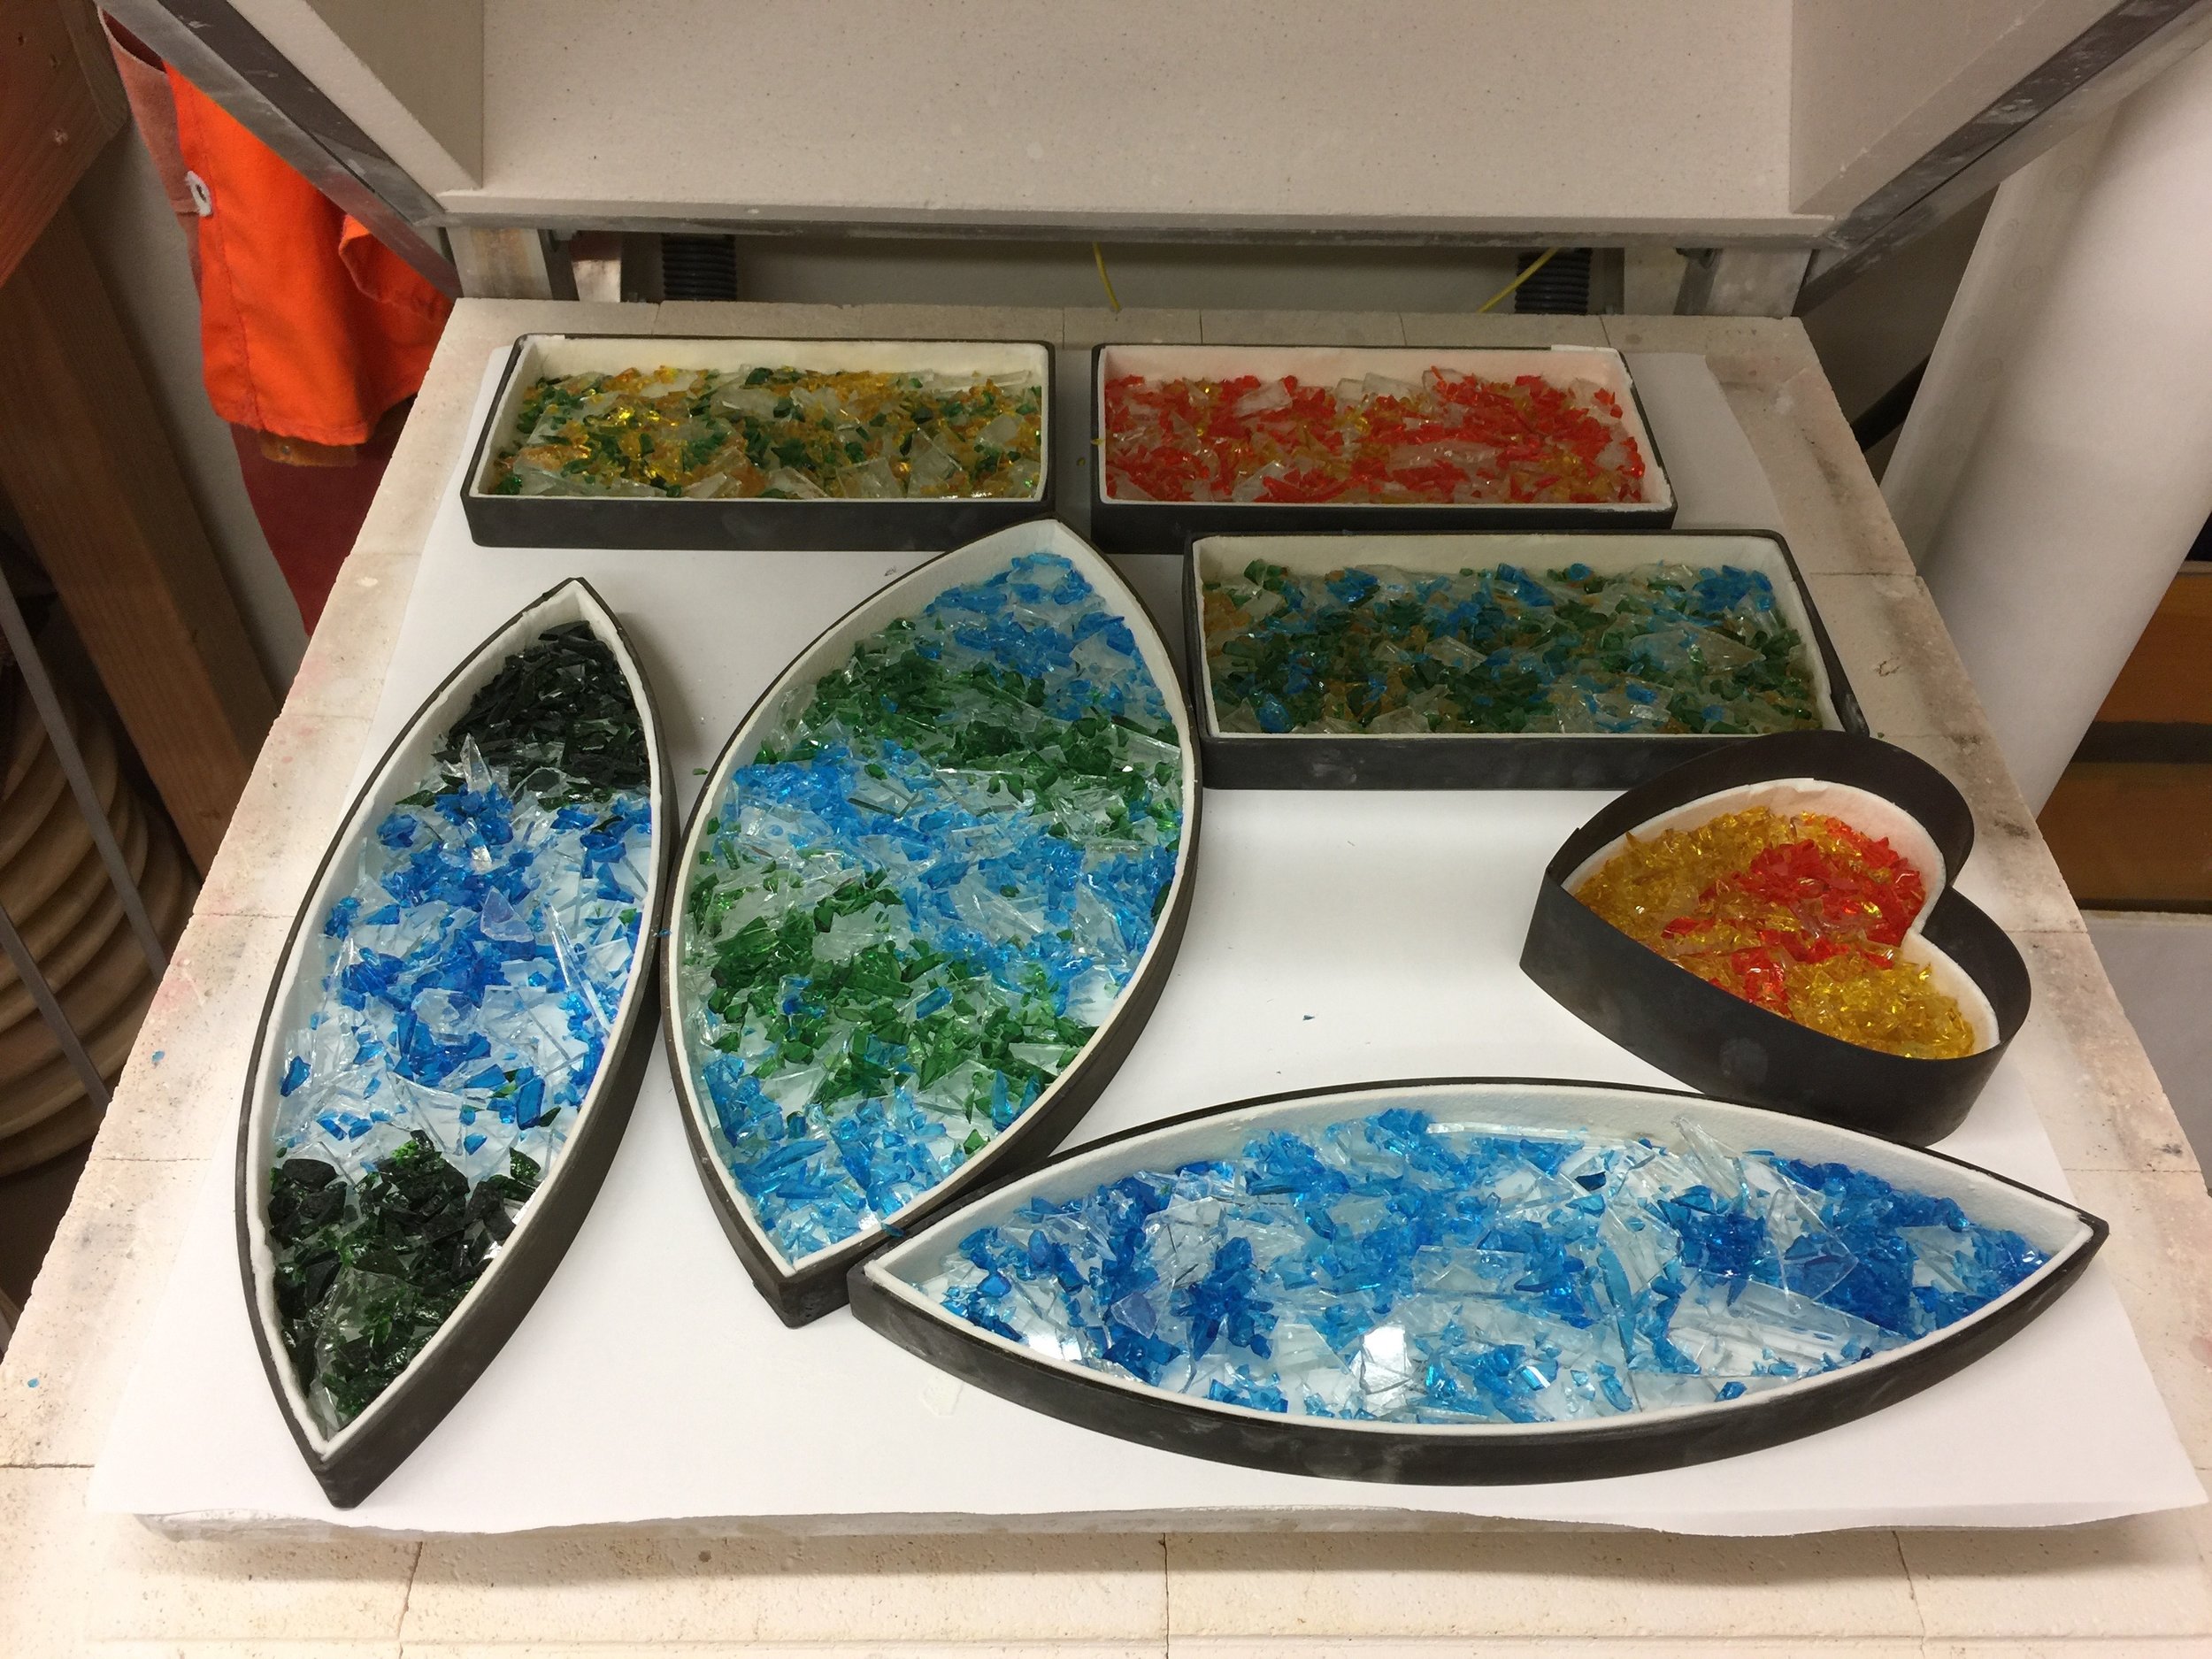
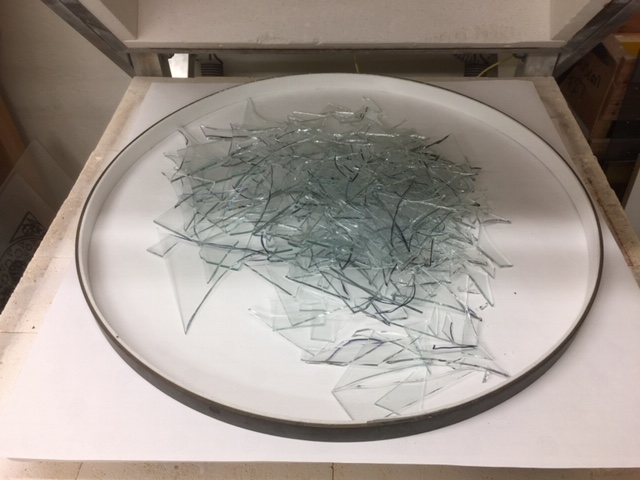
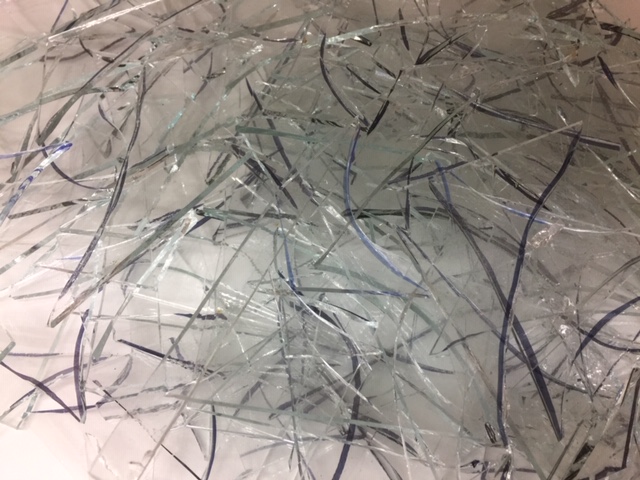
Line your stainless steel forms with 1/8" fiber paper. Where the ends meet put a small piece of scrap thinfire behind the seam as insurance. Put the form on thinfire or a well kiln washed shelf. Be sure the 1/8" is pushed all the way to the shelf leaving no gaps. Smash up your clean clear scrap with a hammer and sift off any dust and fines as they will cloud up the melt. Fill the form about half way. Next smash up any other scrap that you want to use for your color and put on top of the clear.be sure you have enough so that after it is melted you will at least have 2 complete layers. It will melt down a lot so be generous. On a melt like this in 96 I will use the following schedule which is pretty fast. On these I do not even much of a bubble squeeze as I like the interior bubbles here with a smooth top! If you do not you can add one.
450/1225/20 (the hold is determined by the size of the pieces)
500/1480/30
9999/960/2 hr (If firing for extra thick add more tie to the anneal….this hold is determined by the thickness of the melt so it is better to over anneal than under anneal.)
100/600/off

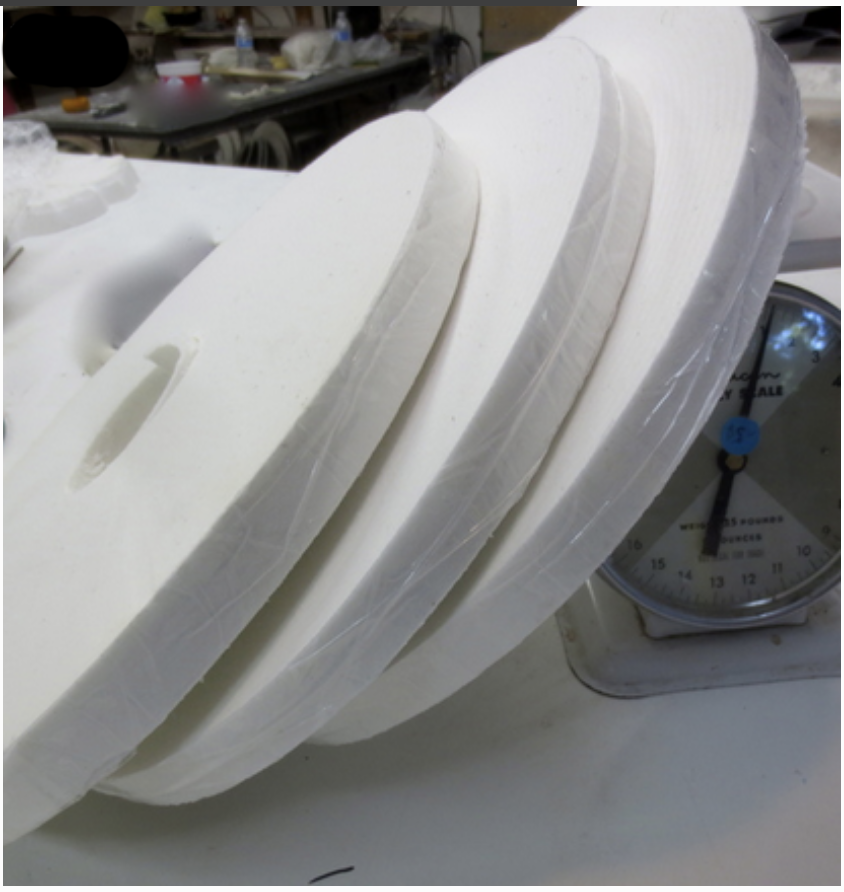
This is the 1/8” fiber that we sell. It makes it so easy to line stainless. It comes in 66’ rolls in 1”. It can be found on our site under “Odds and Ends”
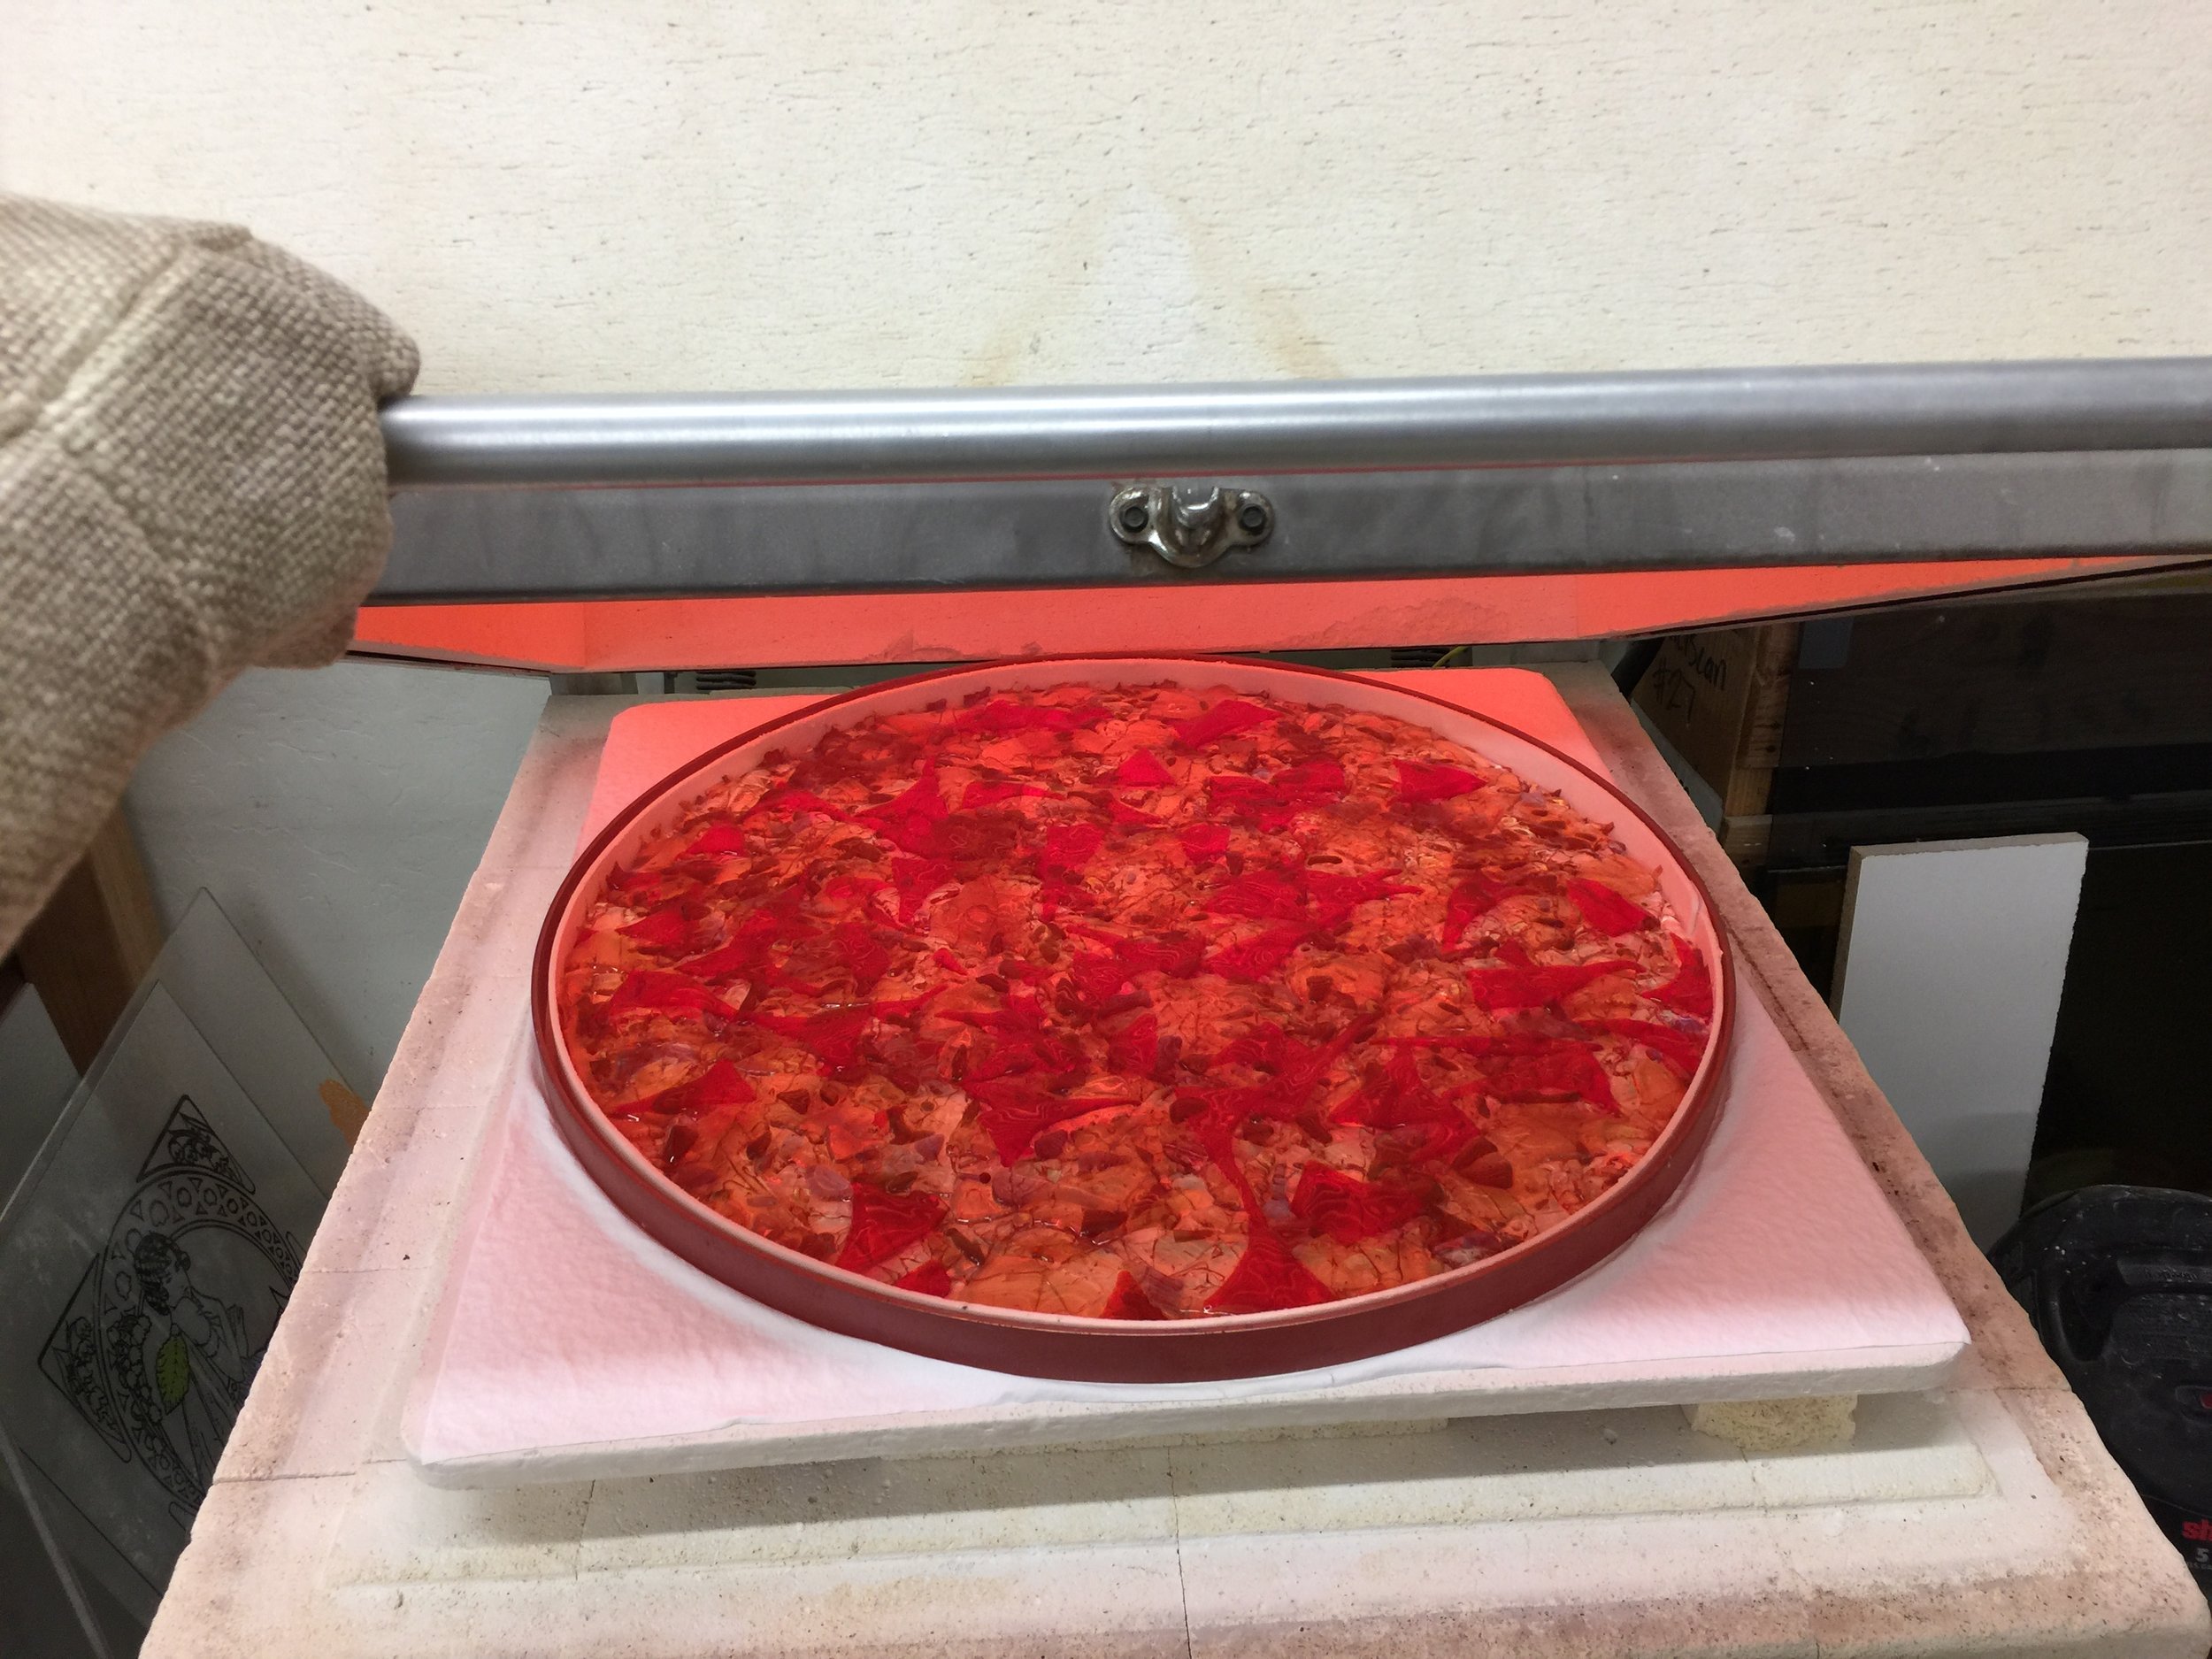
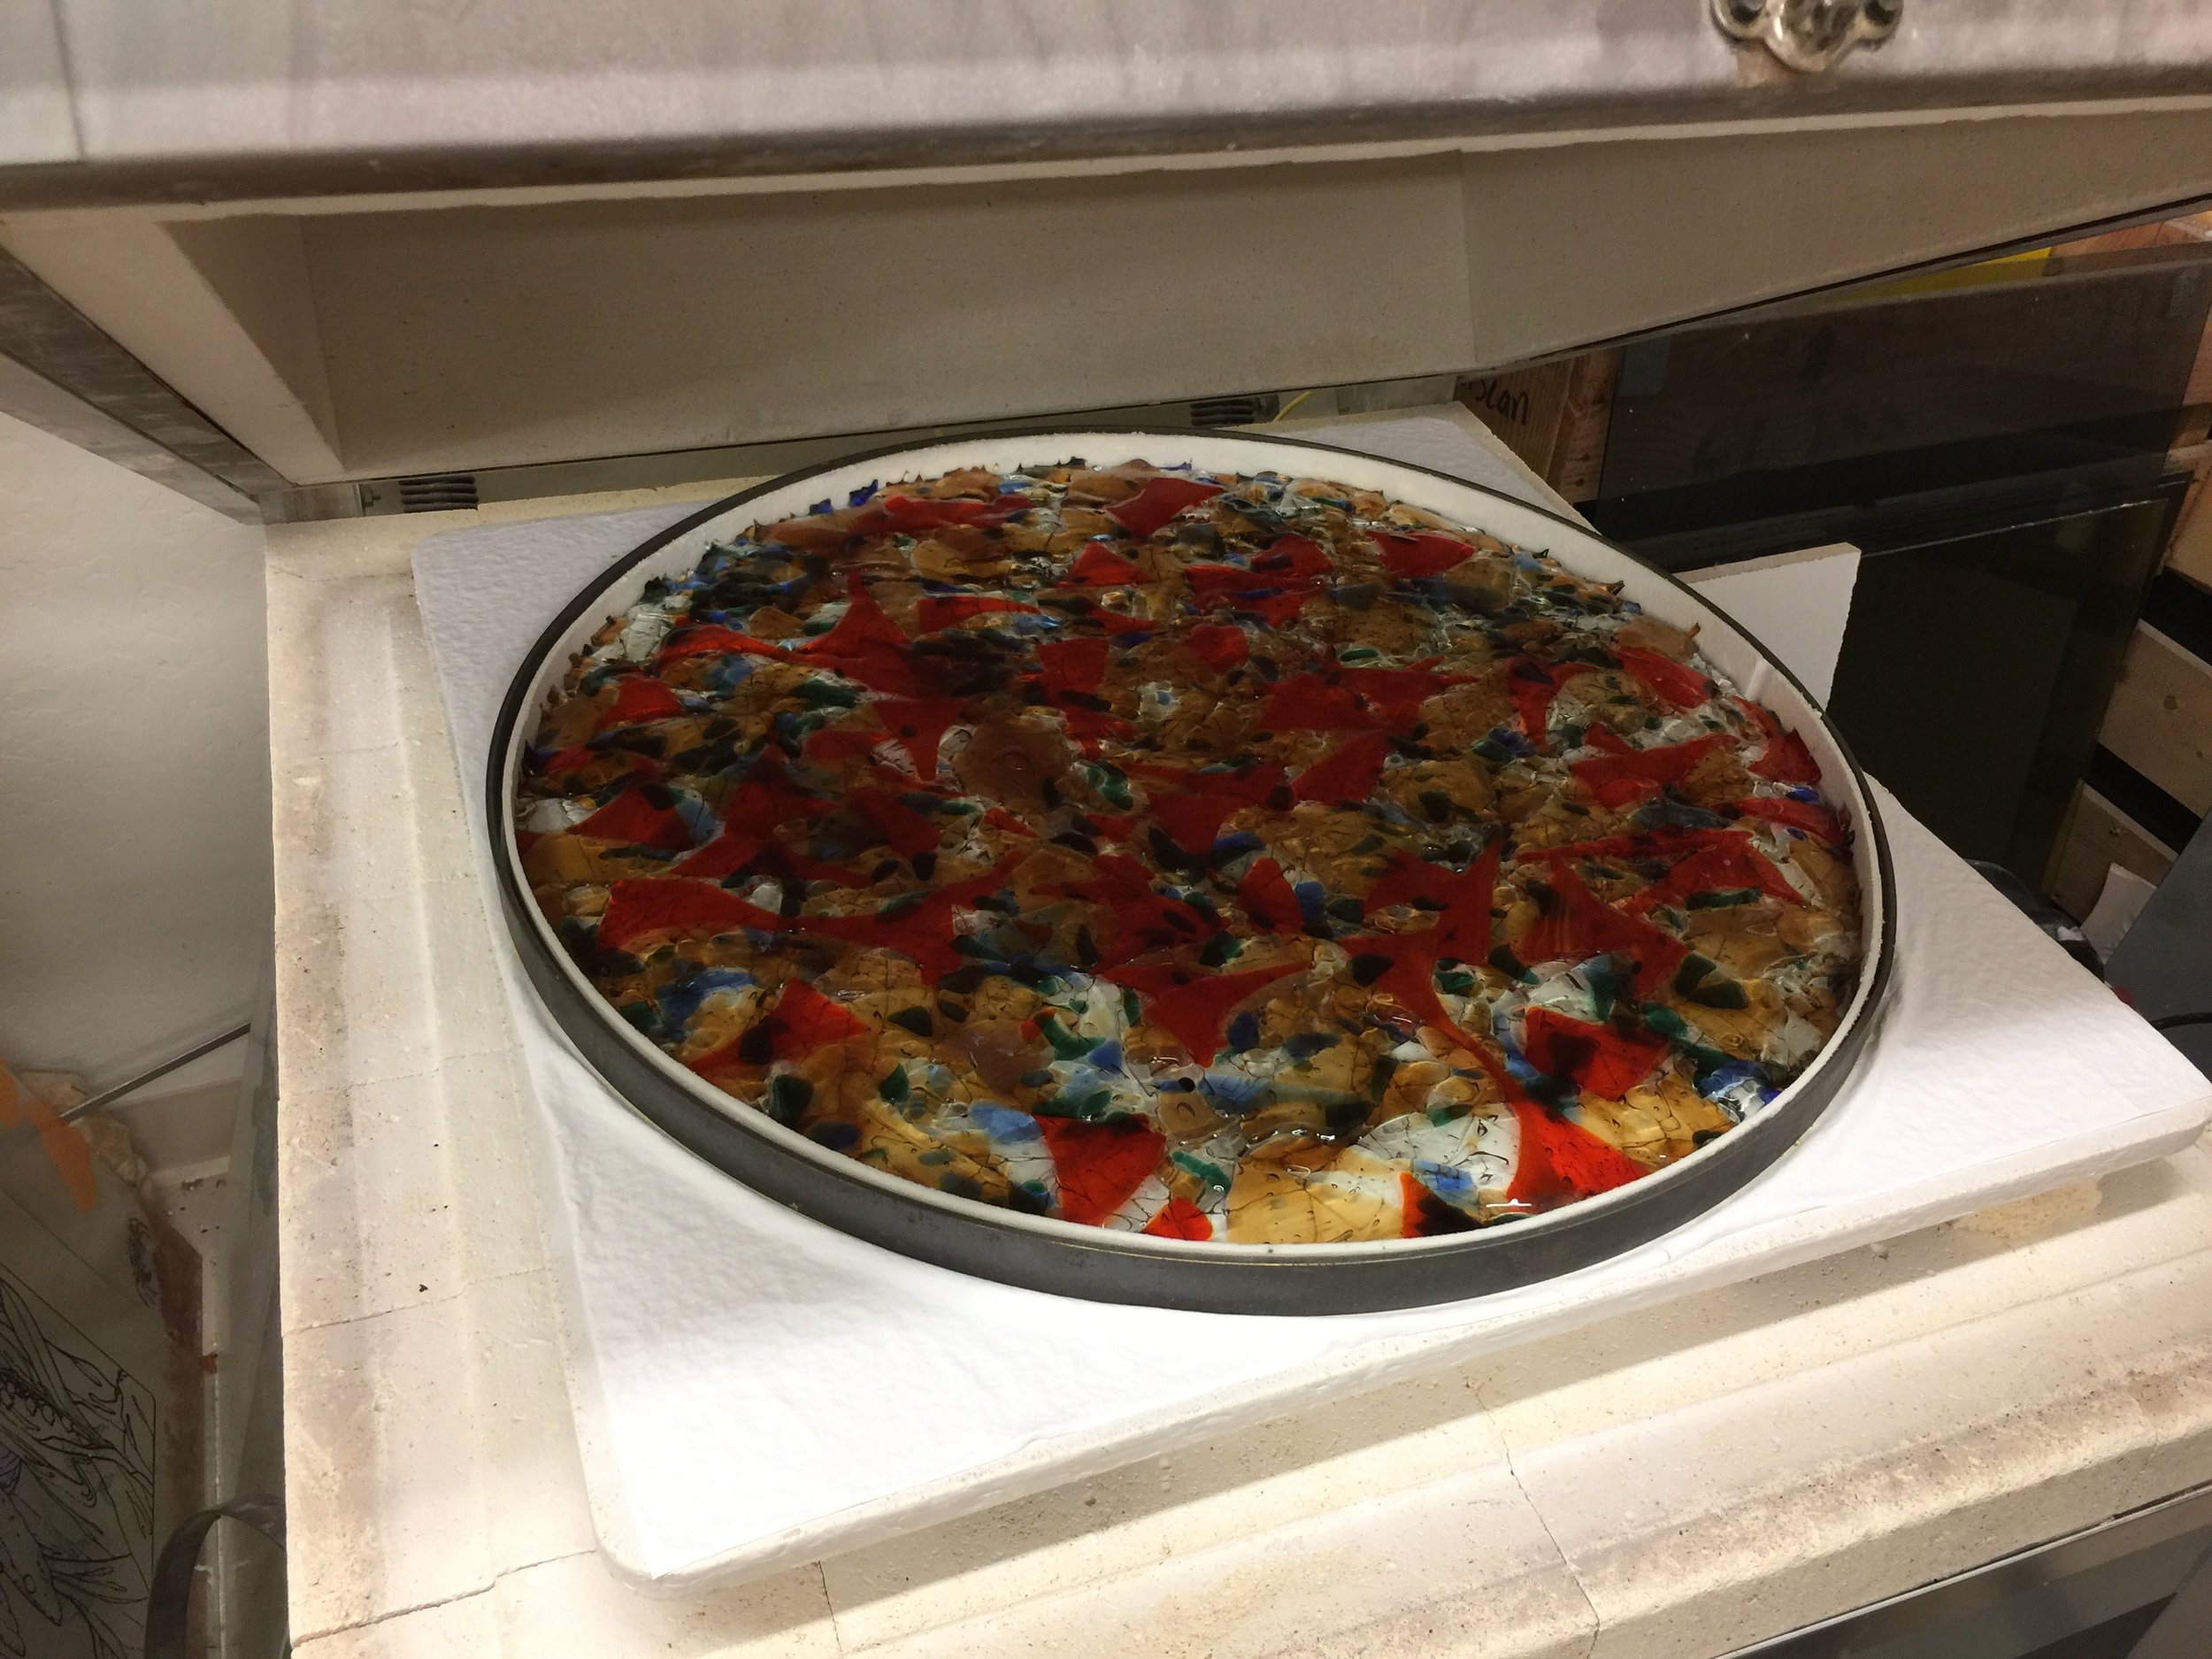
Many people have asked me to tell more about the large 23” scrap melts that I have been making in the last week. I always coldwork the edges on these but if you do not have that equipment you can heavily spray Zyp on the fiber (facing the glass) and you will get very little to no spiking. Also you want your glass to melt to the fiber not down the fiber so place you glass accordingly. Be sure to not forget to put a piece or two of thinfire scrap behind the seam but never taller than the 1/8” as if can flop over onto your glass in the firing. By spraying the fiber it is also easier to remove the glass so that you can use the fiber again and again. On a large piece like this it is best to have 2 sets of hands to keep the fiber in the ring as you remove it. One spot to hold well is always the joint of 2 ends. If the fiber falls out of the ring it is so soft that you will never get it back in well enough to use. Keep used fiber in a large zip lock bag to use in other projects though!!
One change on larger melts is I no longer hammering all of my clear scrap. I just dump my containers of clear into the form which is sitting on thinfire. You can do this on a kilnwashed shelf also but I am a thinfire fan!
All of black markers all burn off. For teachers….if you ask your students to please clean the glass before they cut their shapes then you end up with a fairly clean glass. You just need to watch out for labels and label residue. also it helps if you keep a cover on your scrap bin. For dust all I do is blow it off if needed. These melts are random and fast!
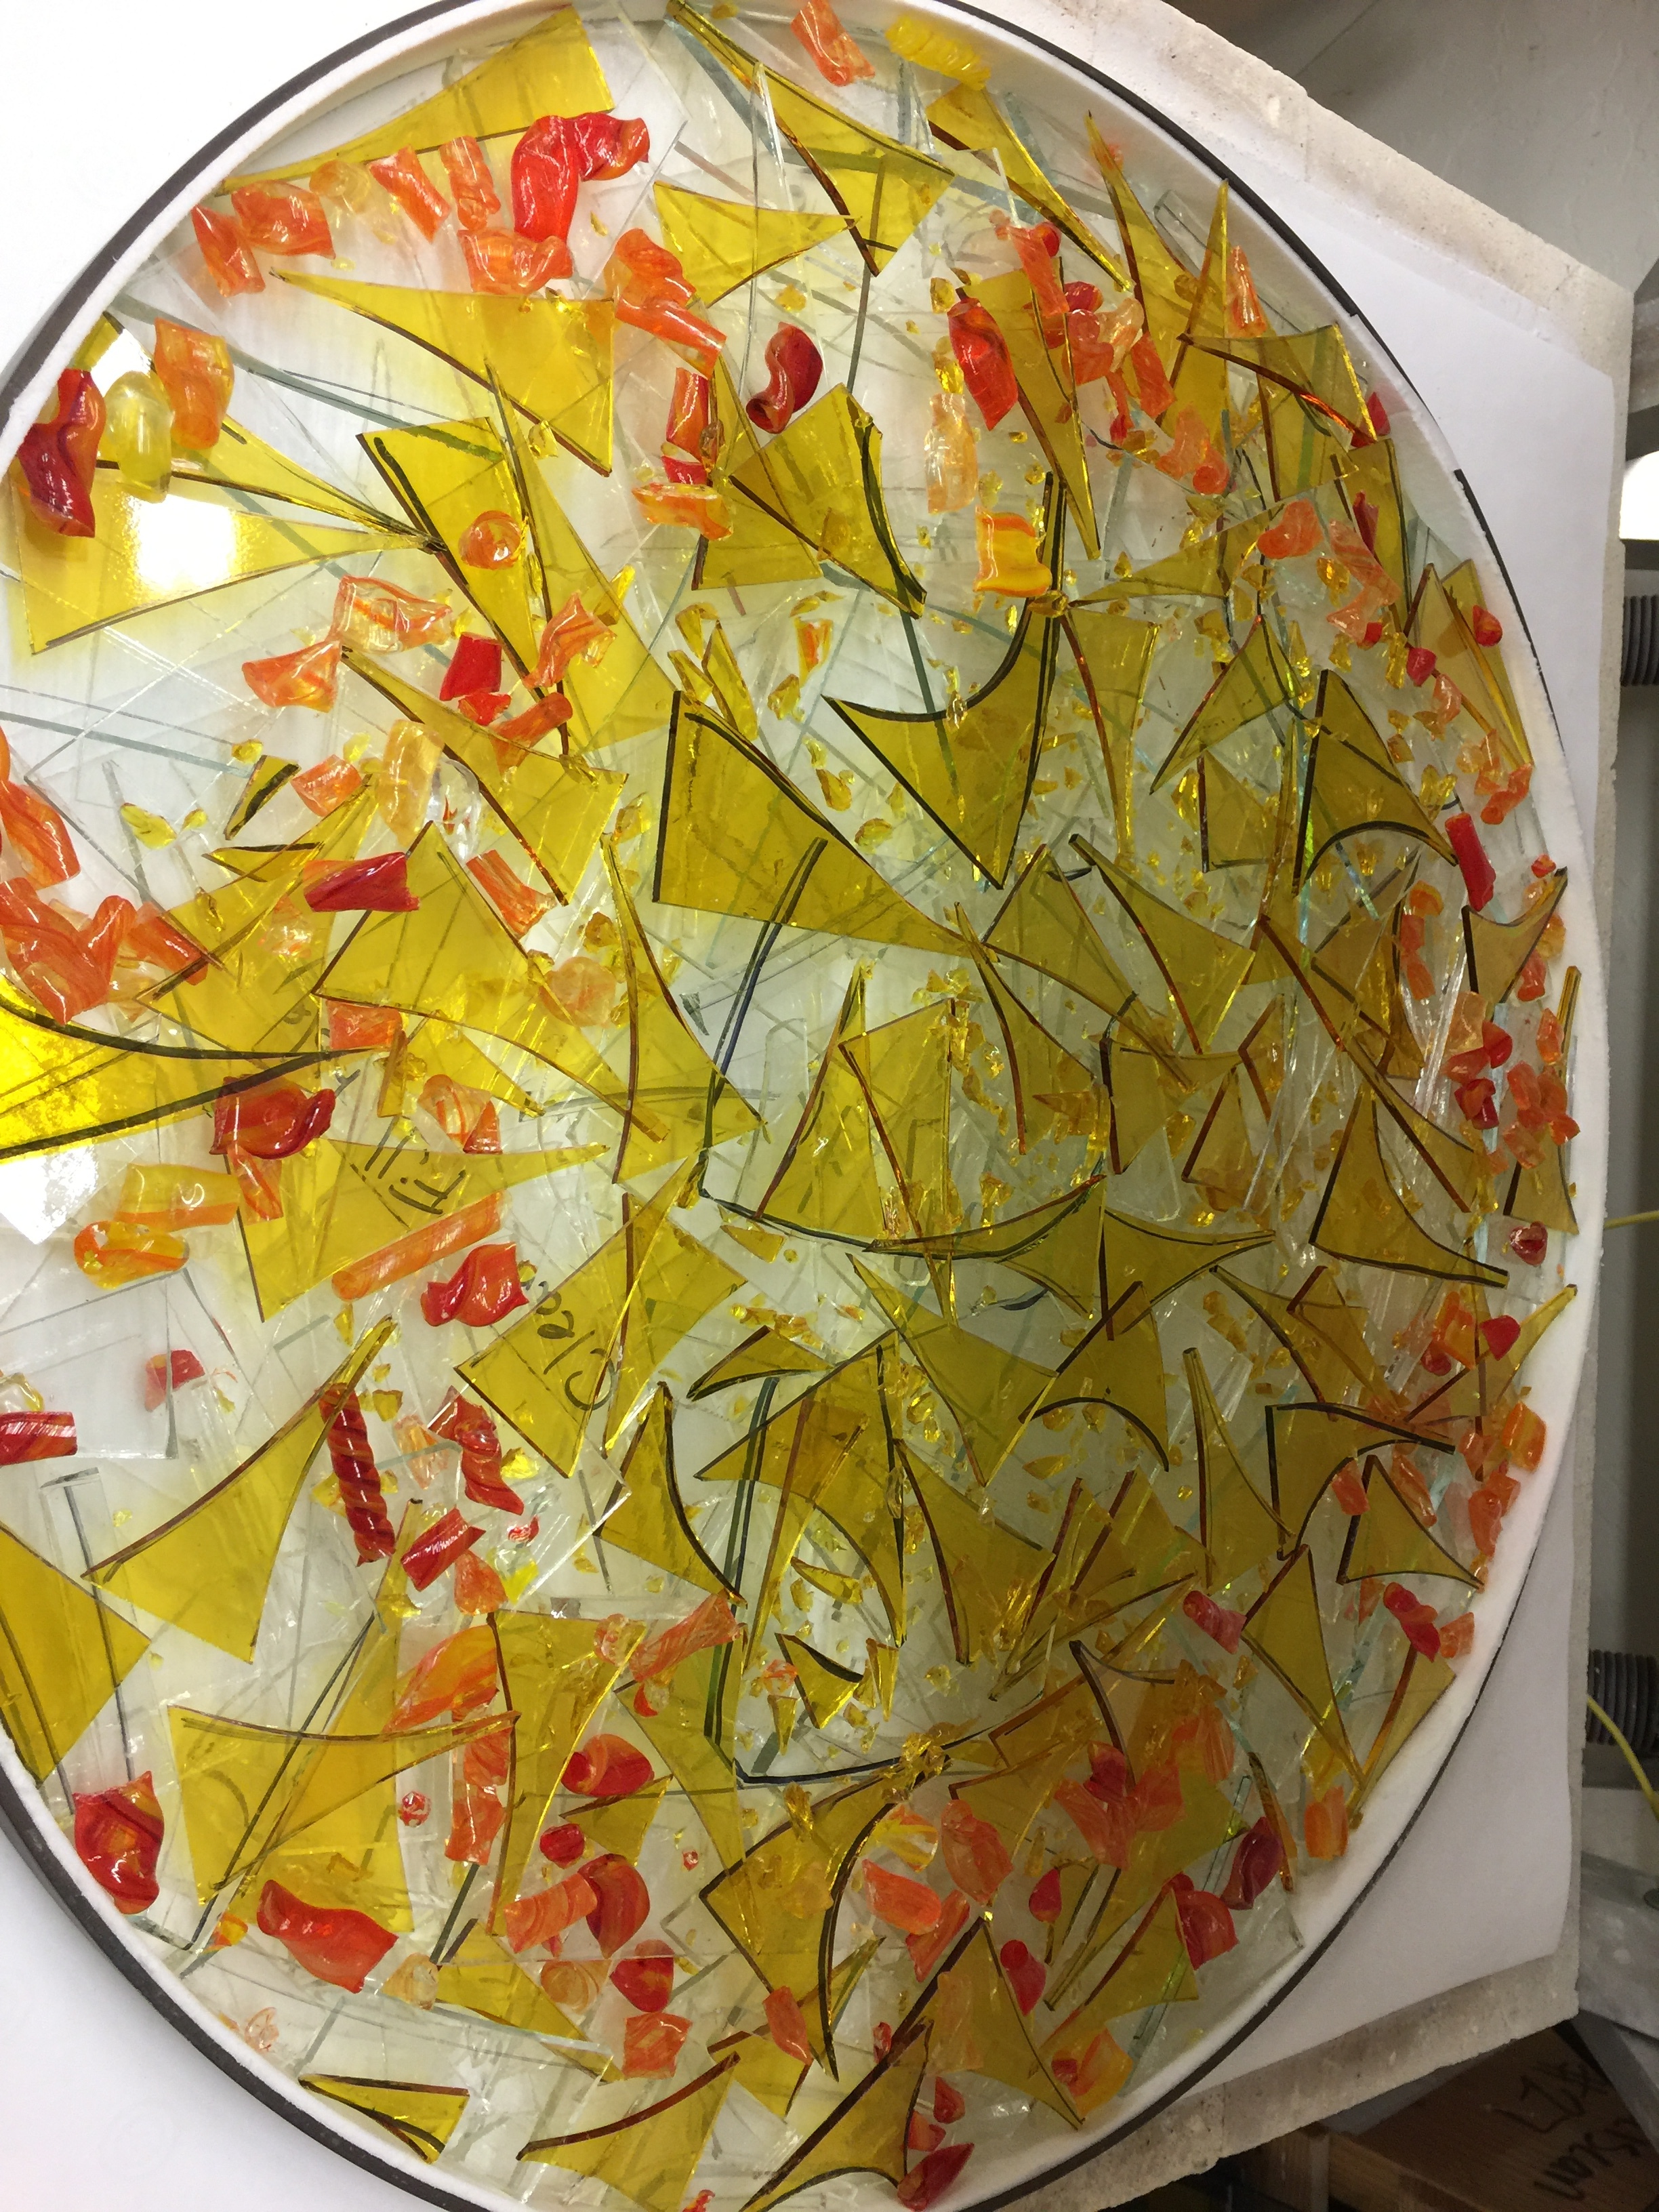
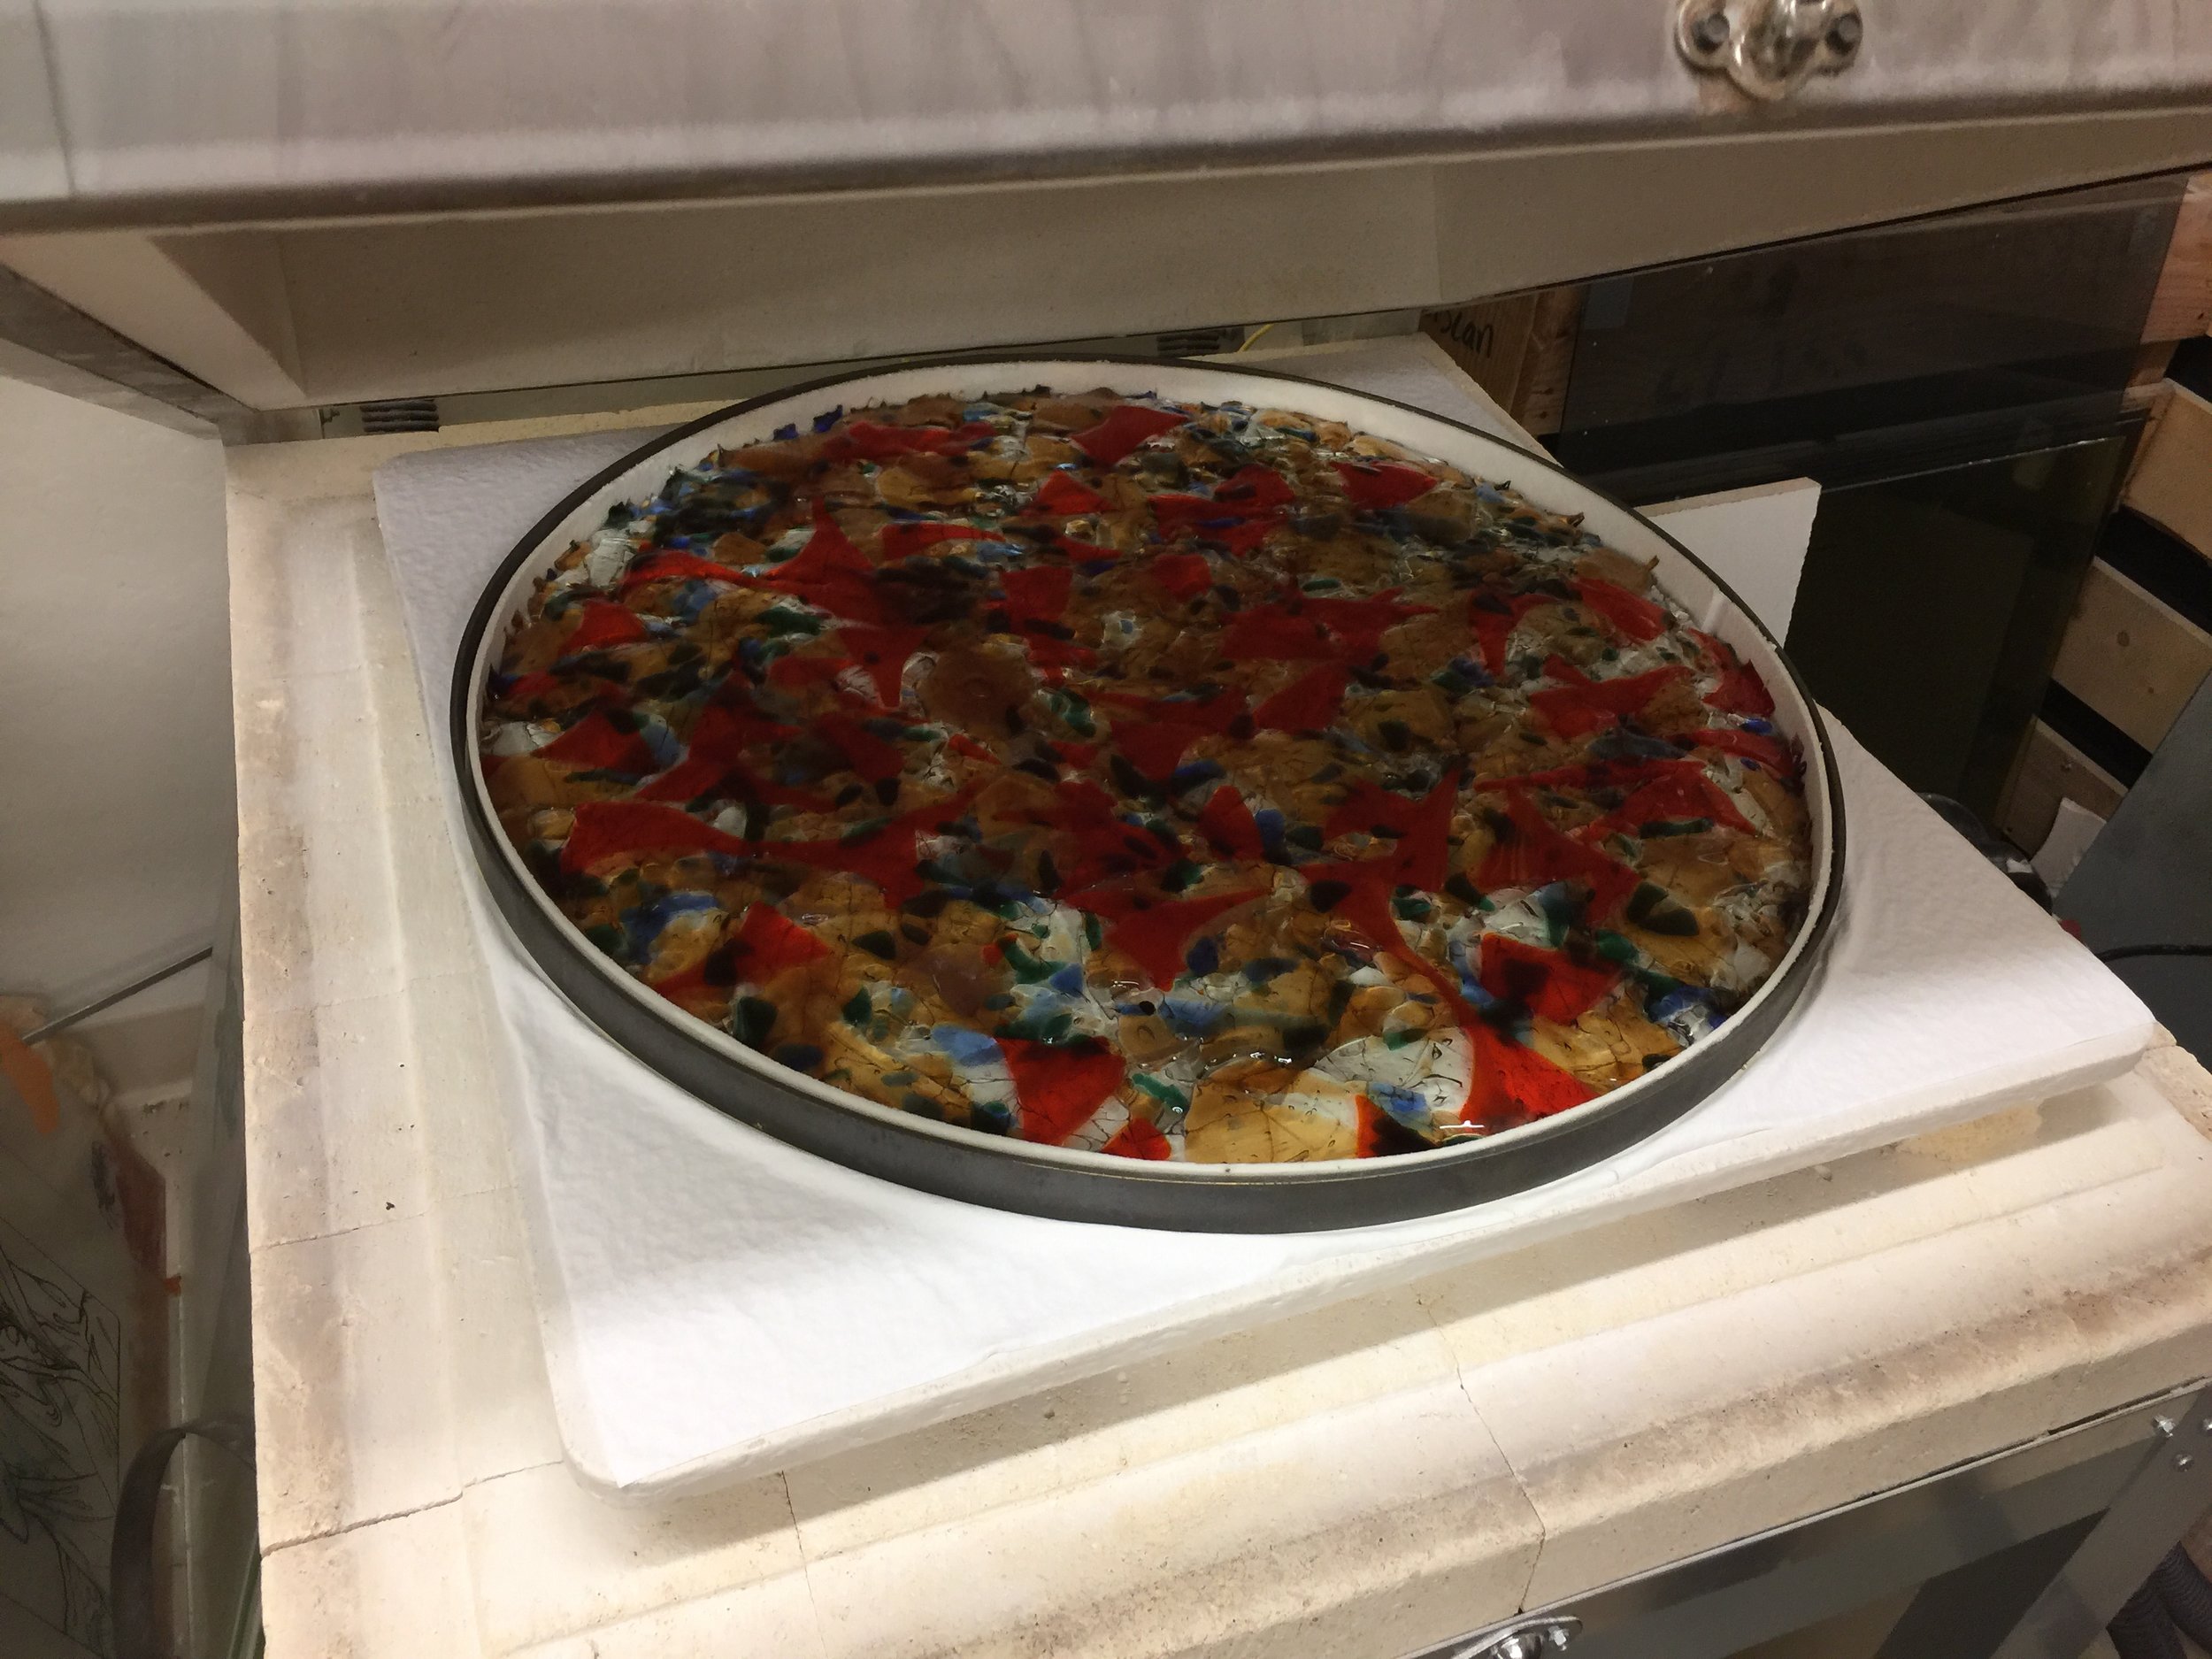
The other thing I am careful about is making sure there is enough glass around the edges. I will go around on a large piece like this and add a “top” piece of scrap all around the round edge. making sure there is at least 2 layers at the edge.
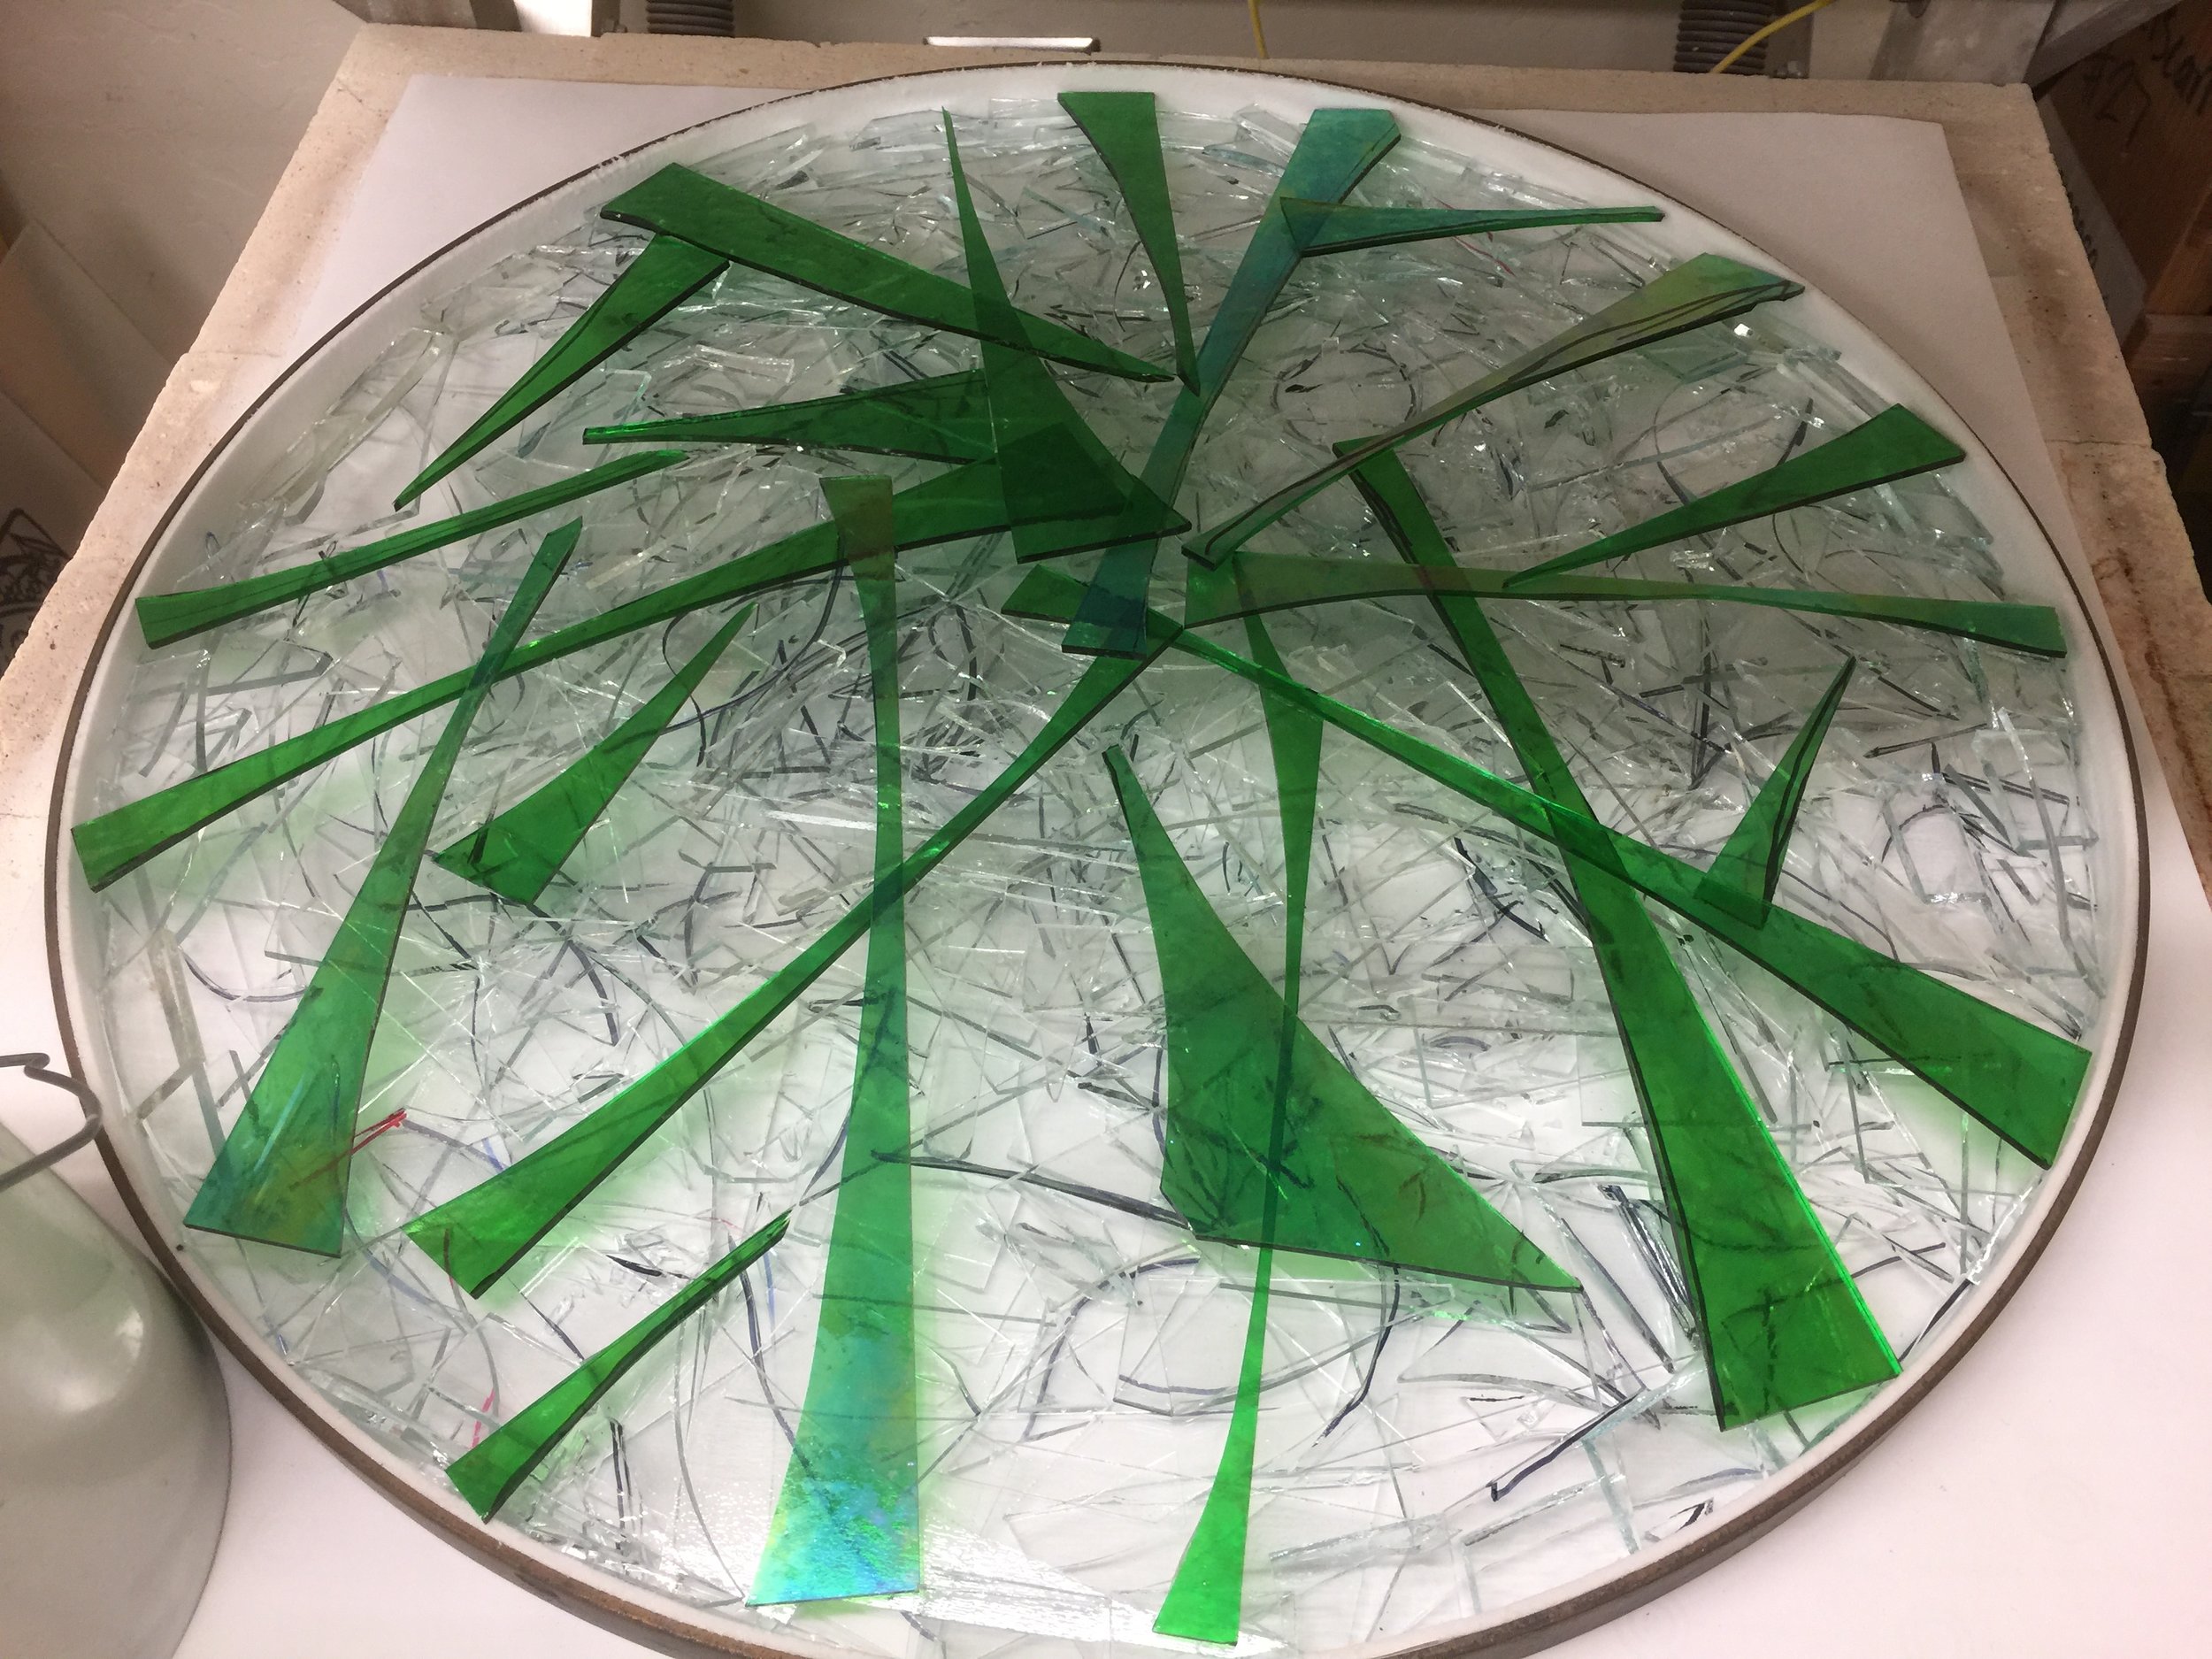
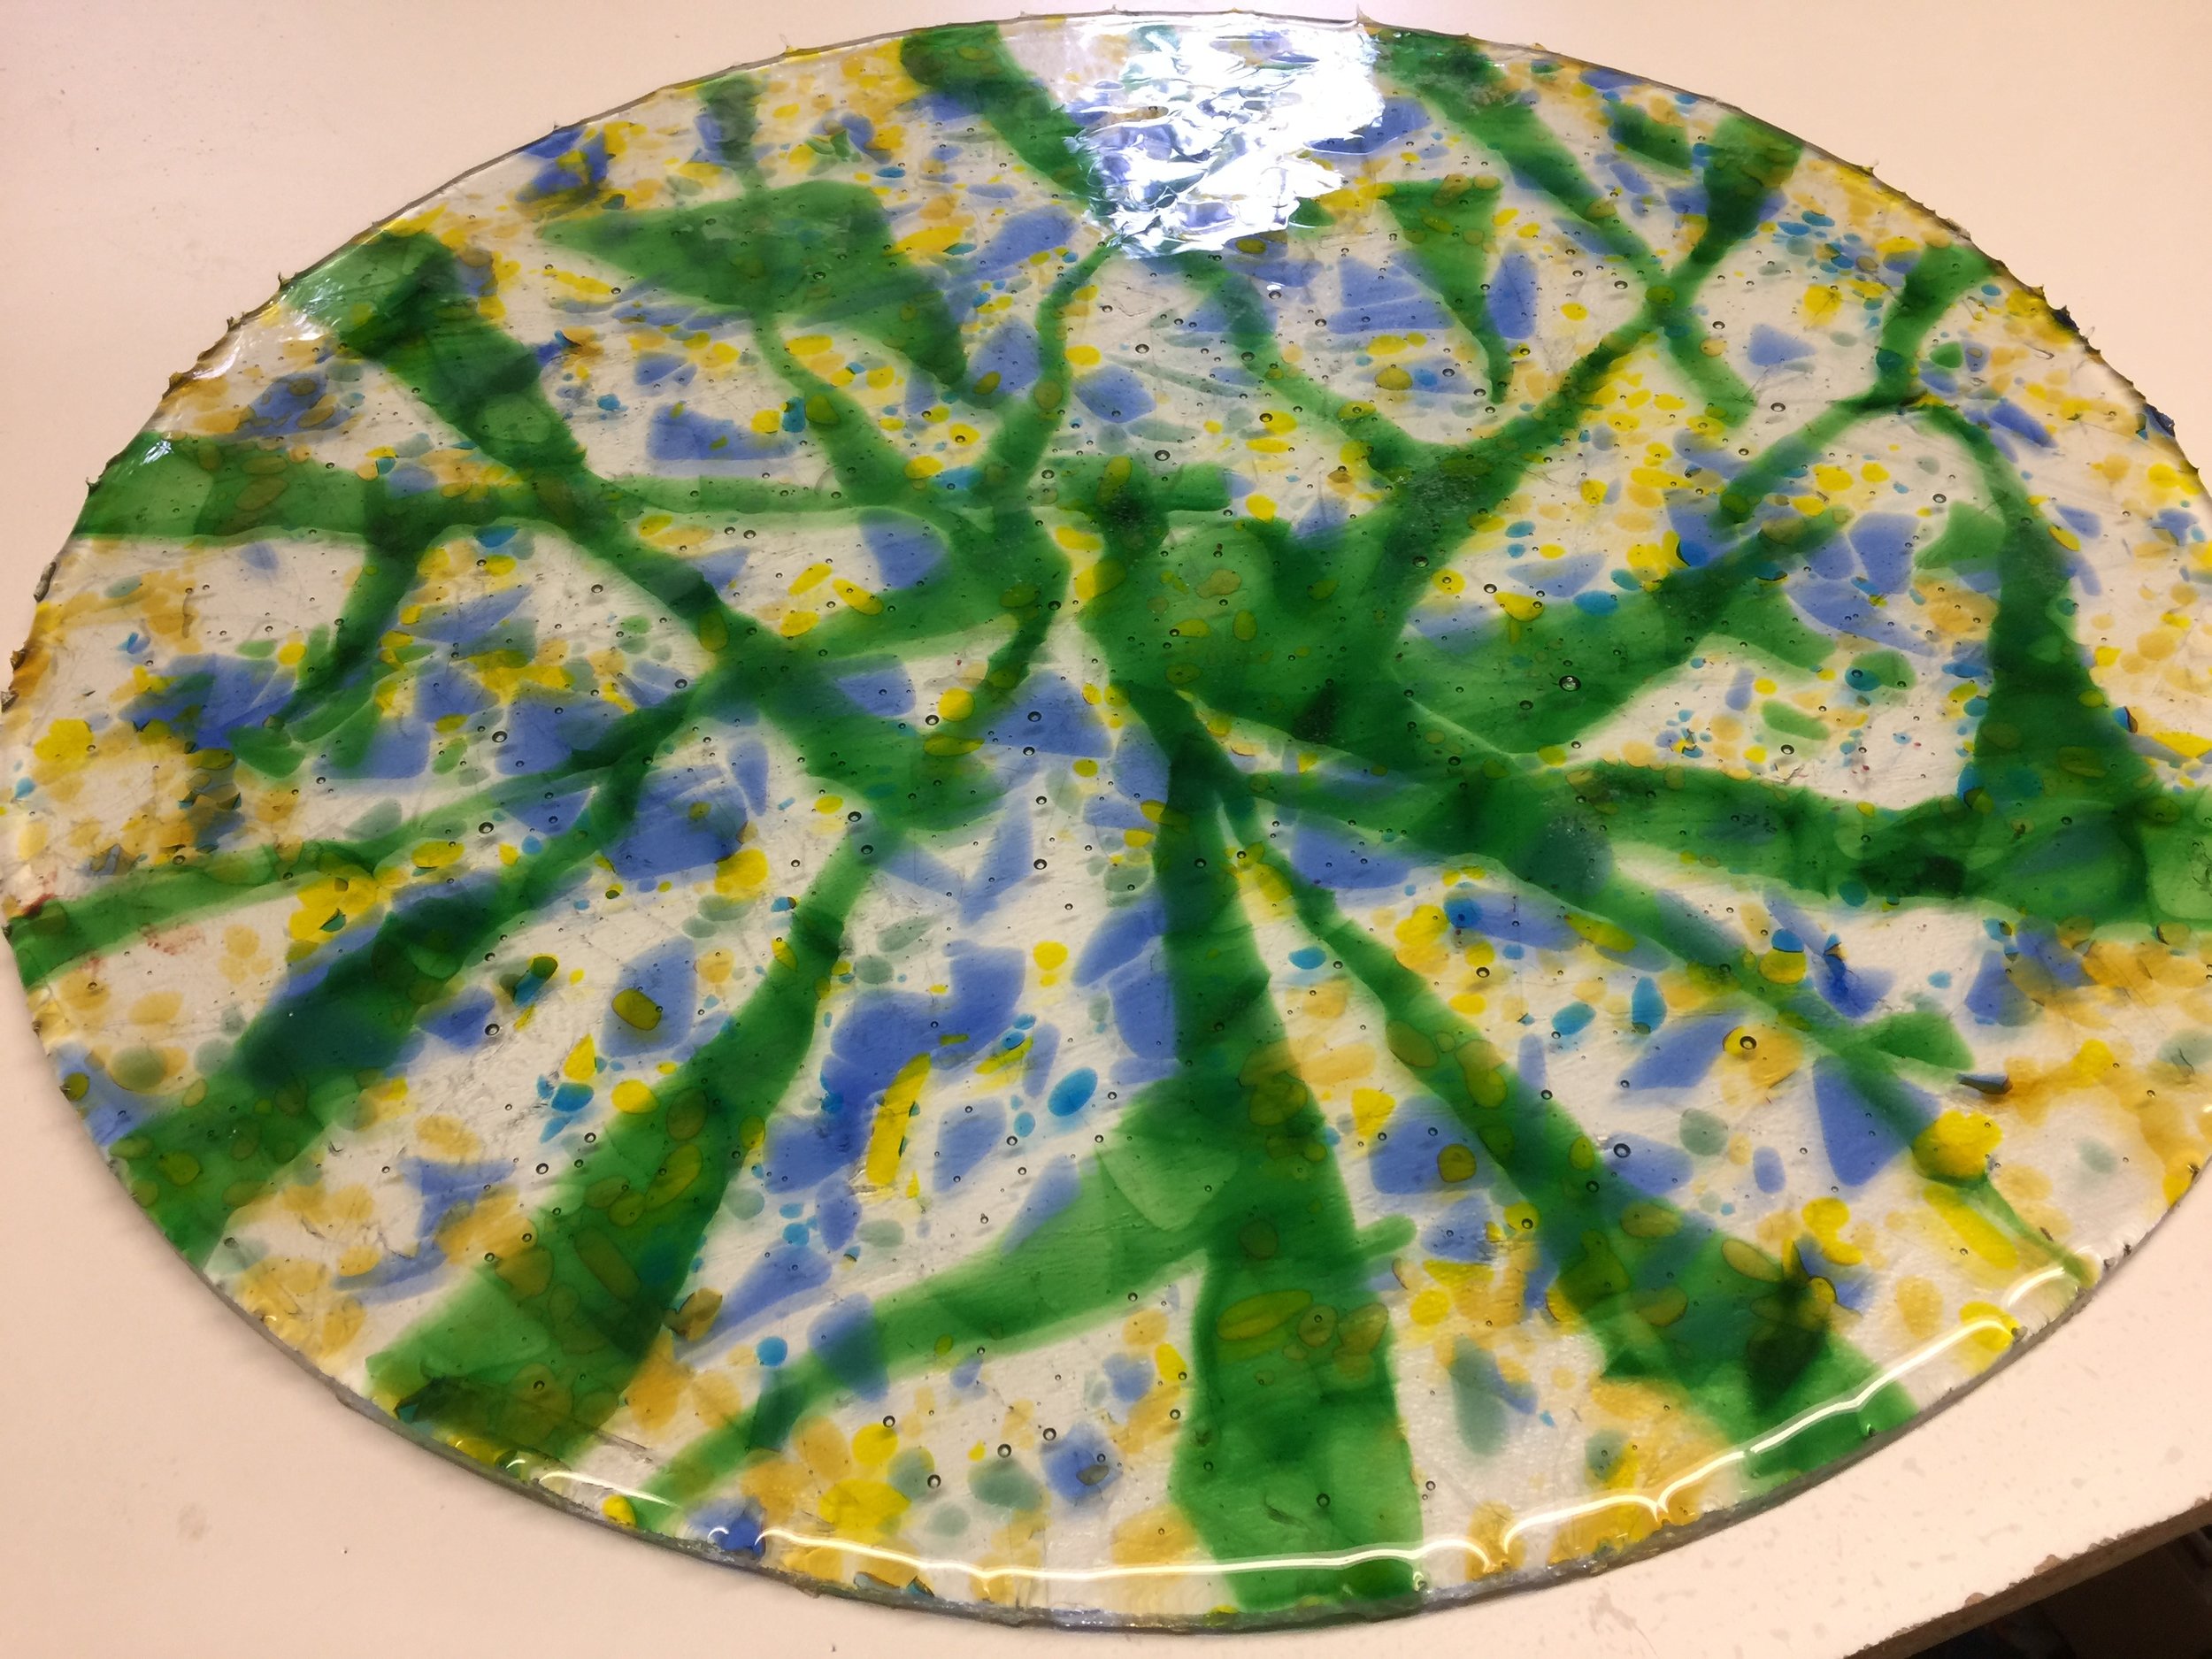
In the clear and green pic I have made sure the clear is spread out and I then start adding other scrap. Having the large volume of scrap clear it will really help to it up and it is much less expensive then using colored for a size like this. It also makes them light up!
At this point I make a decision. Do I want it opaque so that I can put a hanger on the back and have it not be seen or do I want it transparent to have light come thru. Big decision when you really do not know where you are going with the design yet!! After all of the clear is in the form I take a good look at what scrap I want to use and go for it.
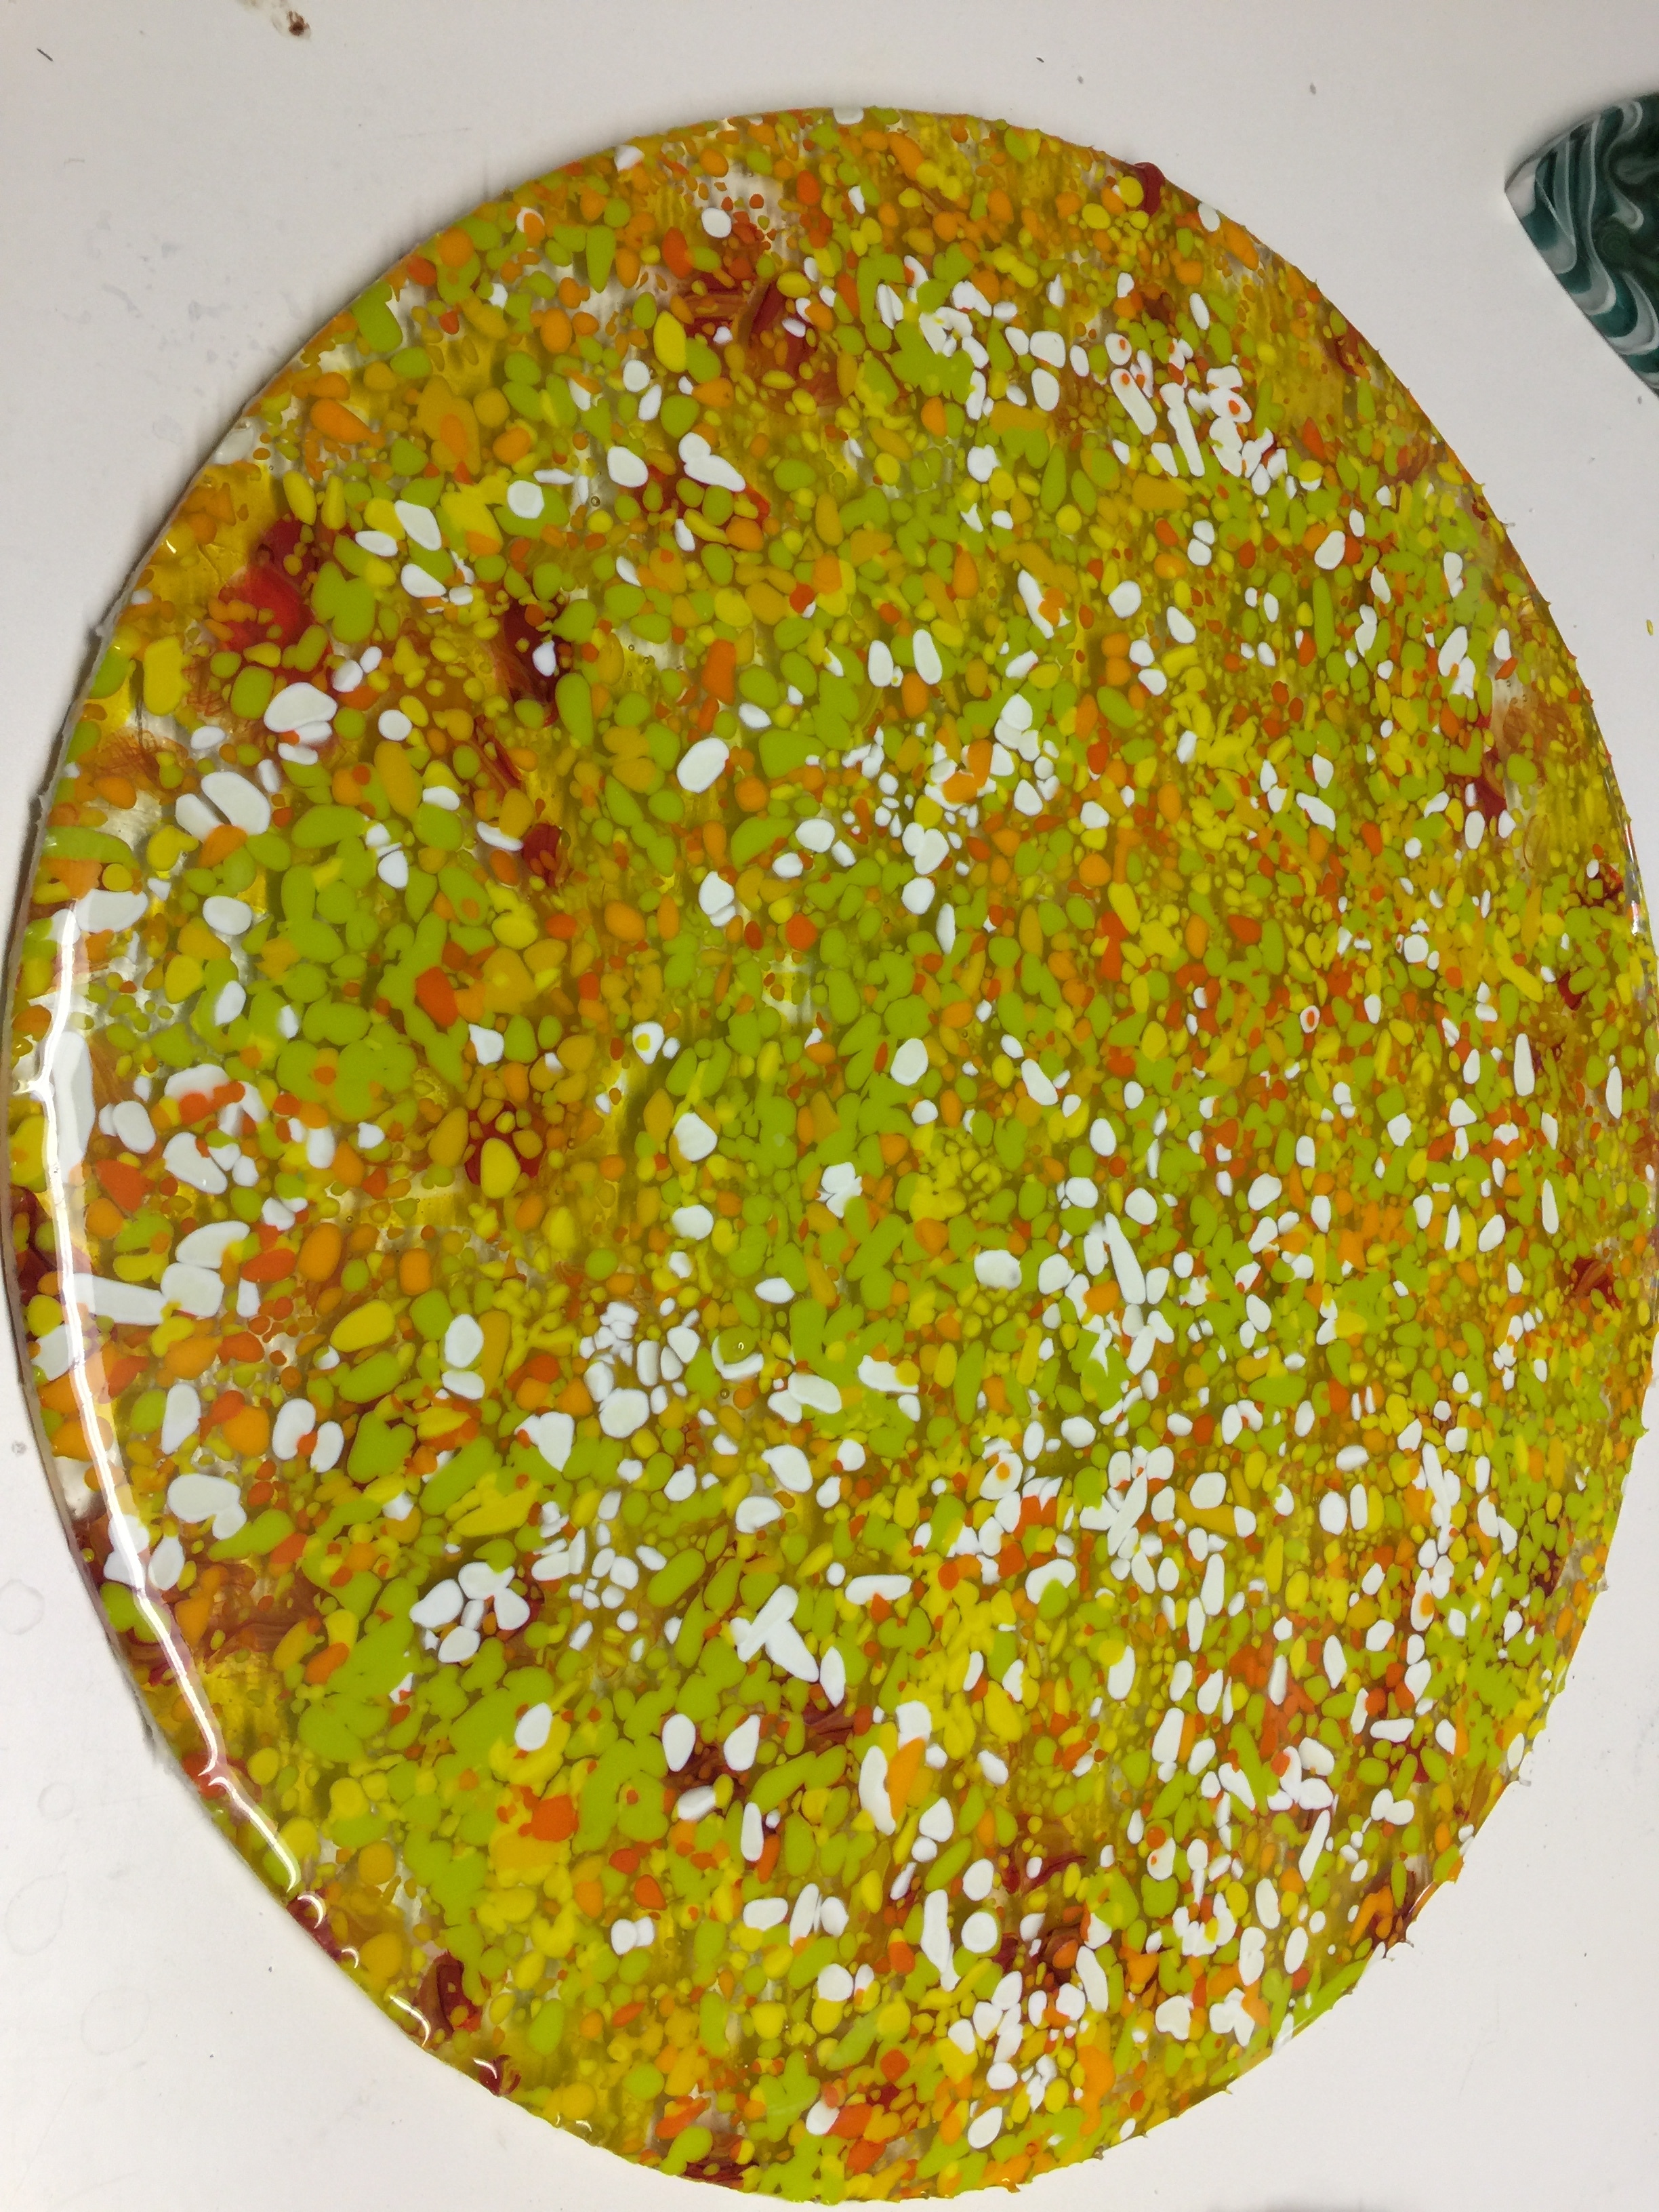
In this melt I started out as transparent but after the first firing I decided to make it opaque and fired it again.
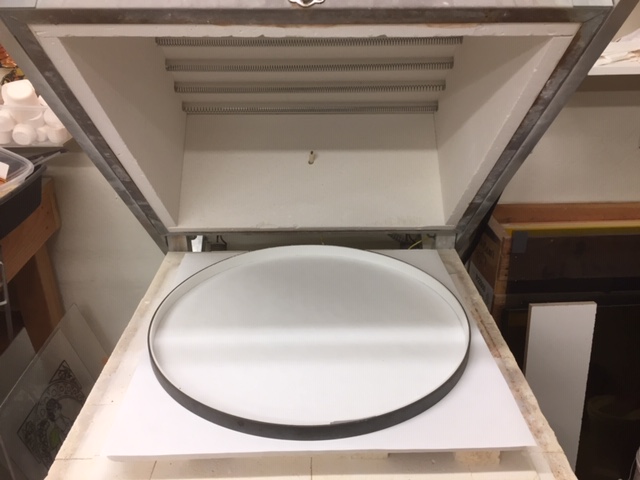
My shelf in this kiln is 24 x 24” so I have made a ring that is 23”.
We can make any size round or square stainless steel rings for you. Just email for pricing. email to bkpottery@aol.com

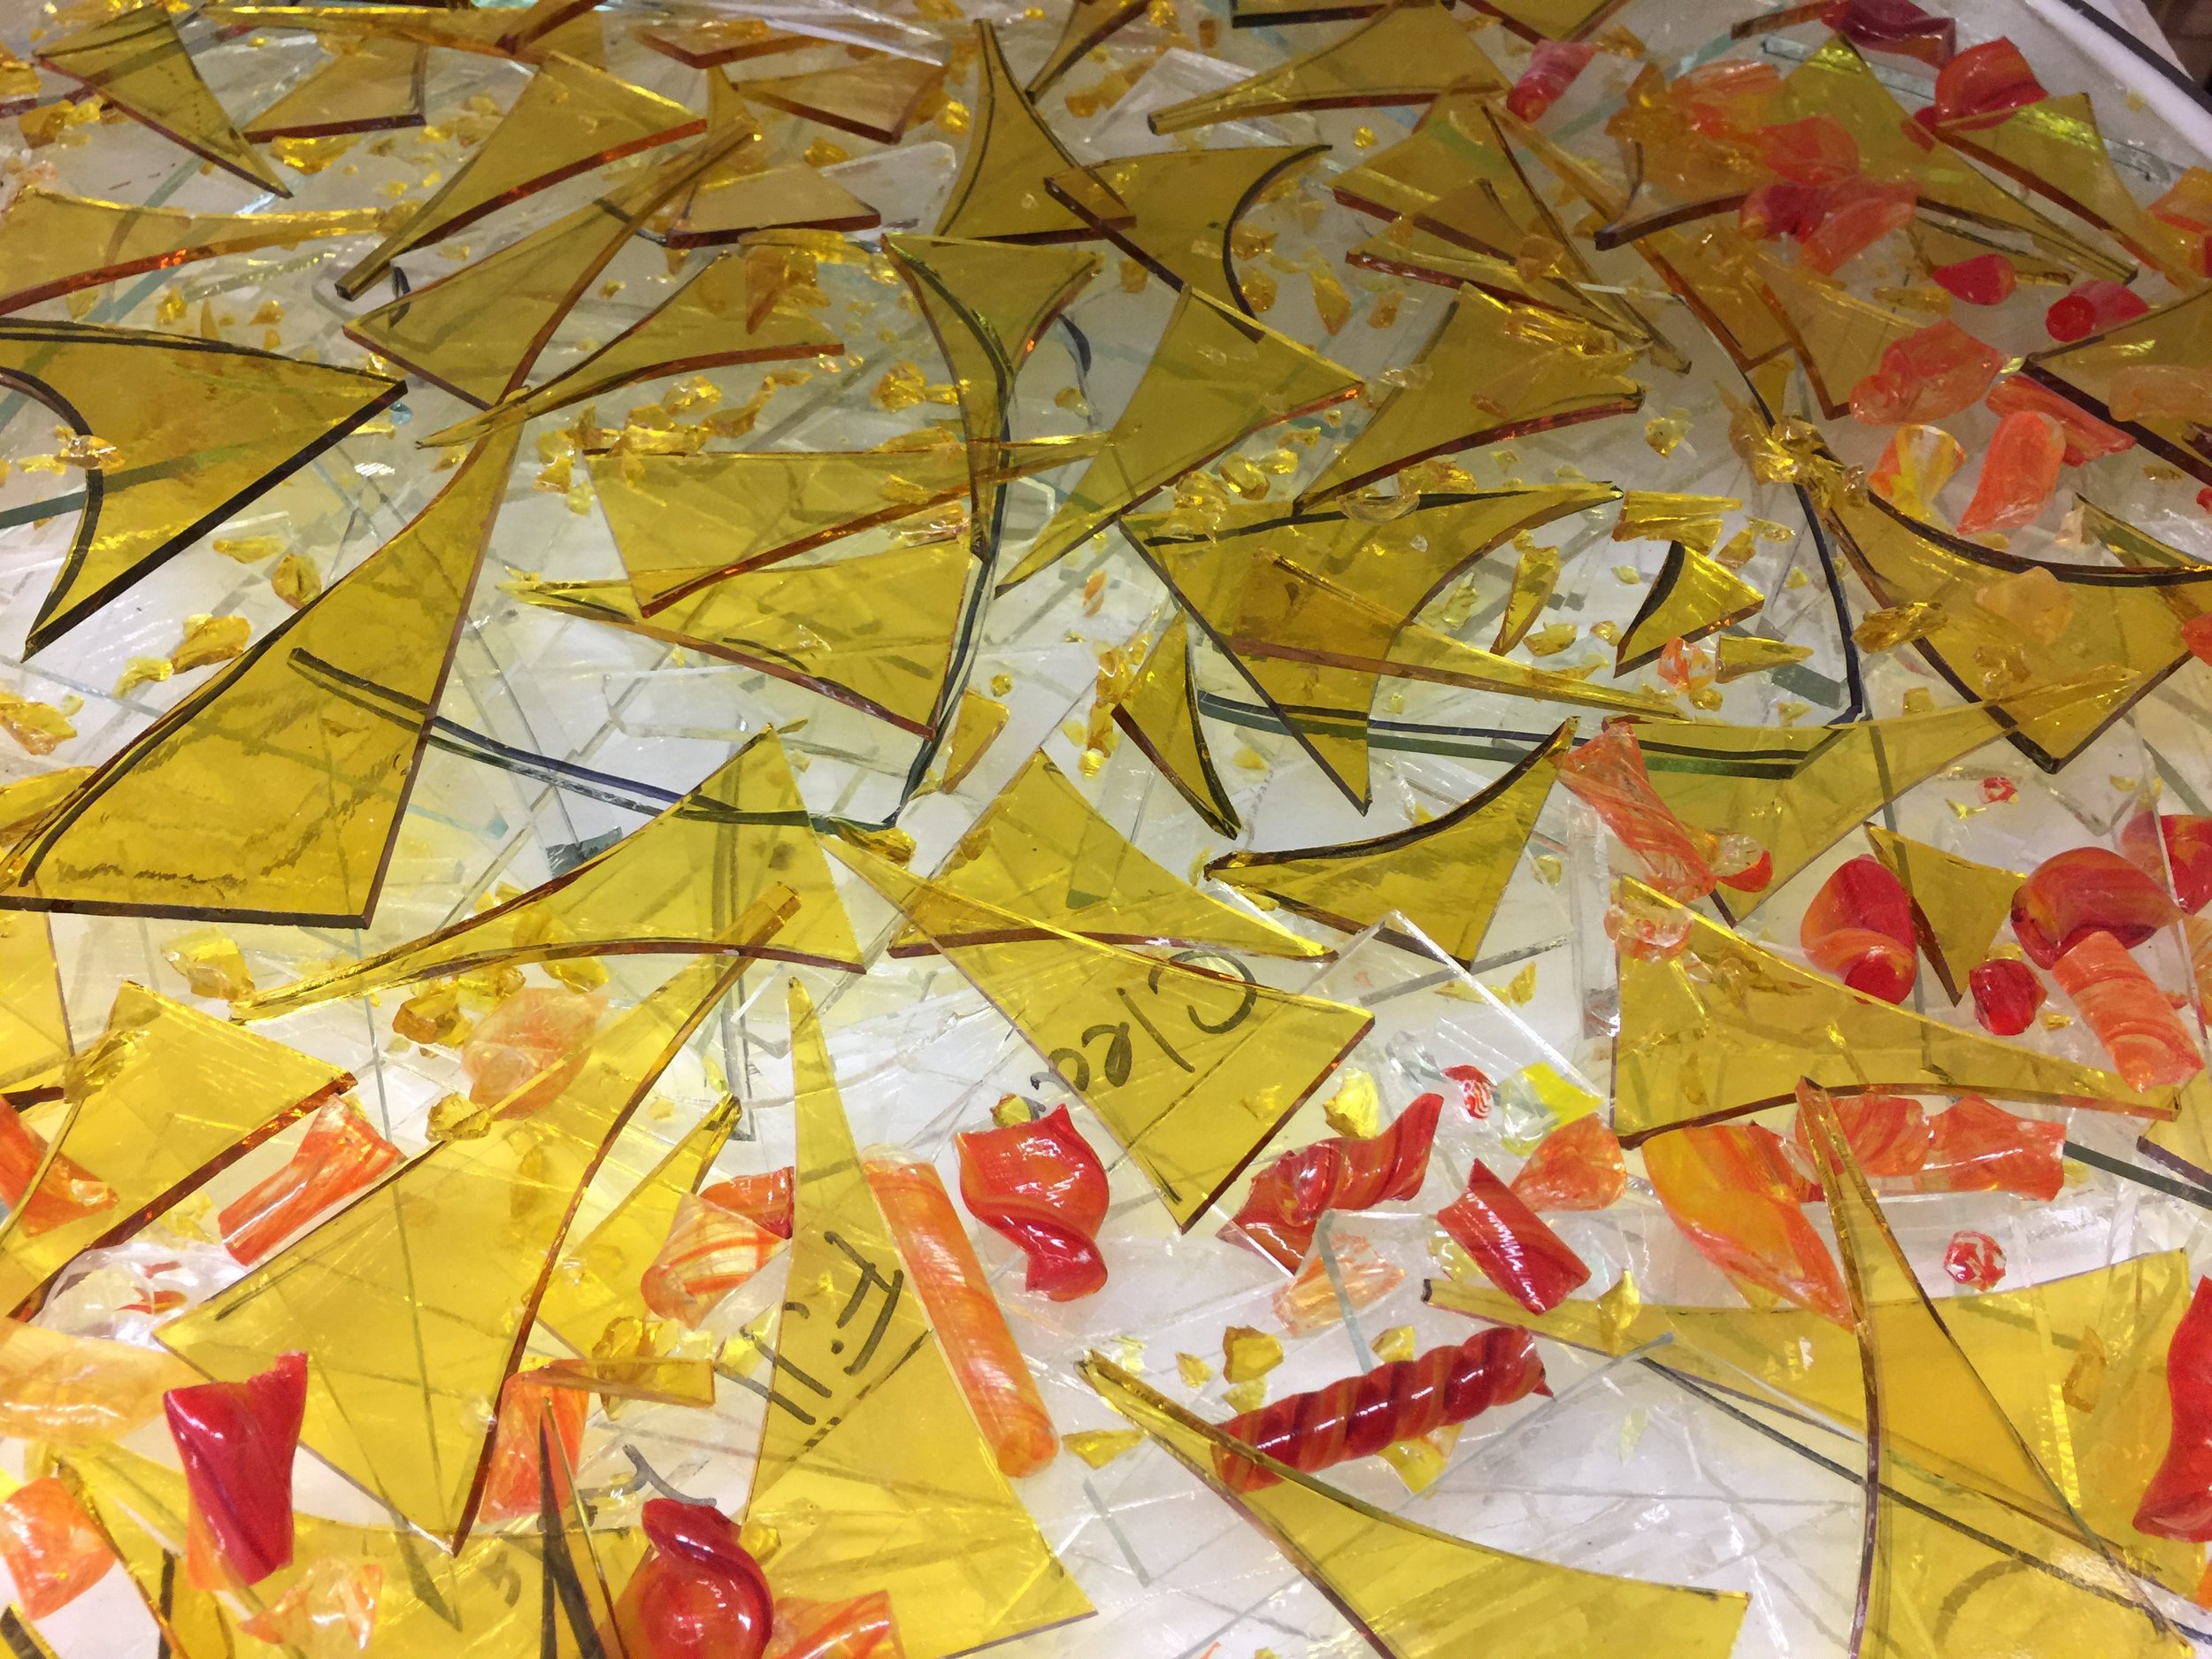
Here it is after the first firing and then after I added opaque scrap onto the top layer. I did smash all of the opaque frit sifting off and "fines” and dust after doing so. This piece will get coldworked (not much) and then fired one more time out of the ring. I will be adding s design but I have not decided yet on what it will be.
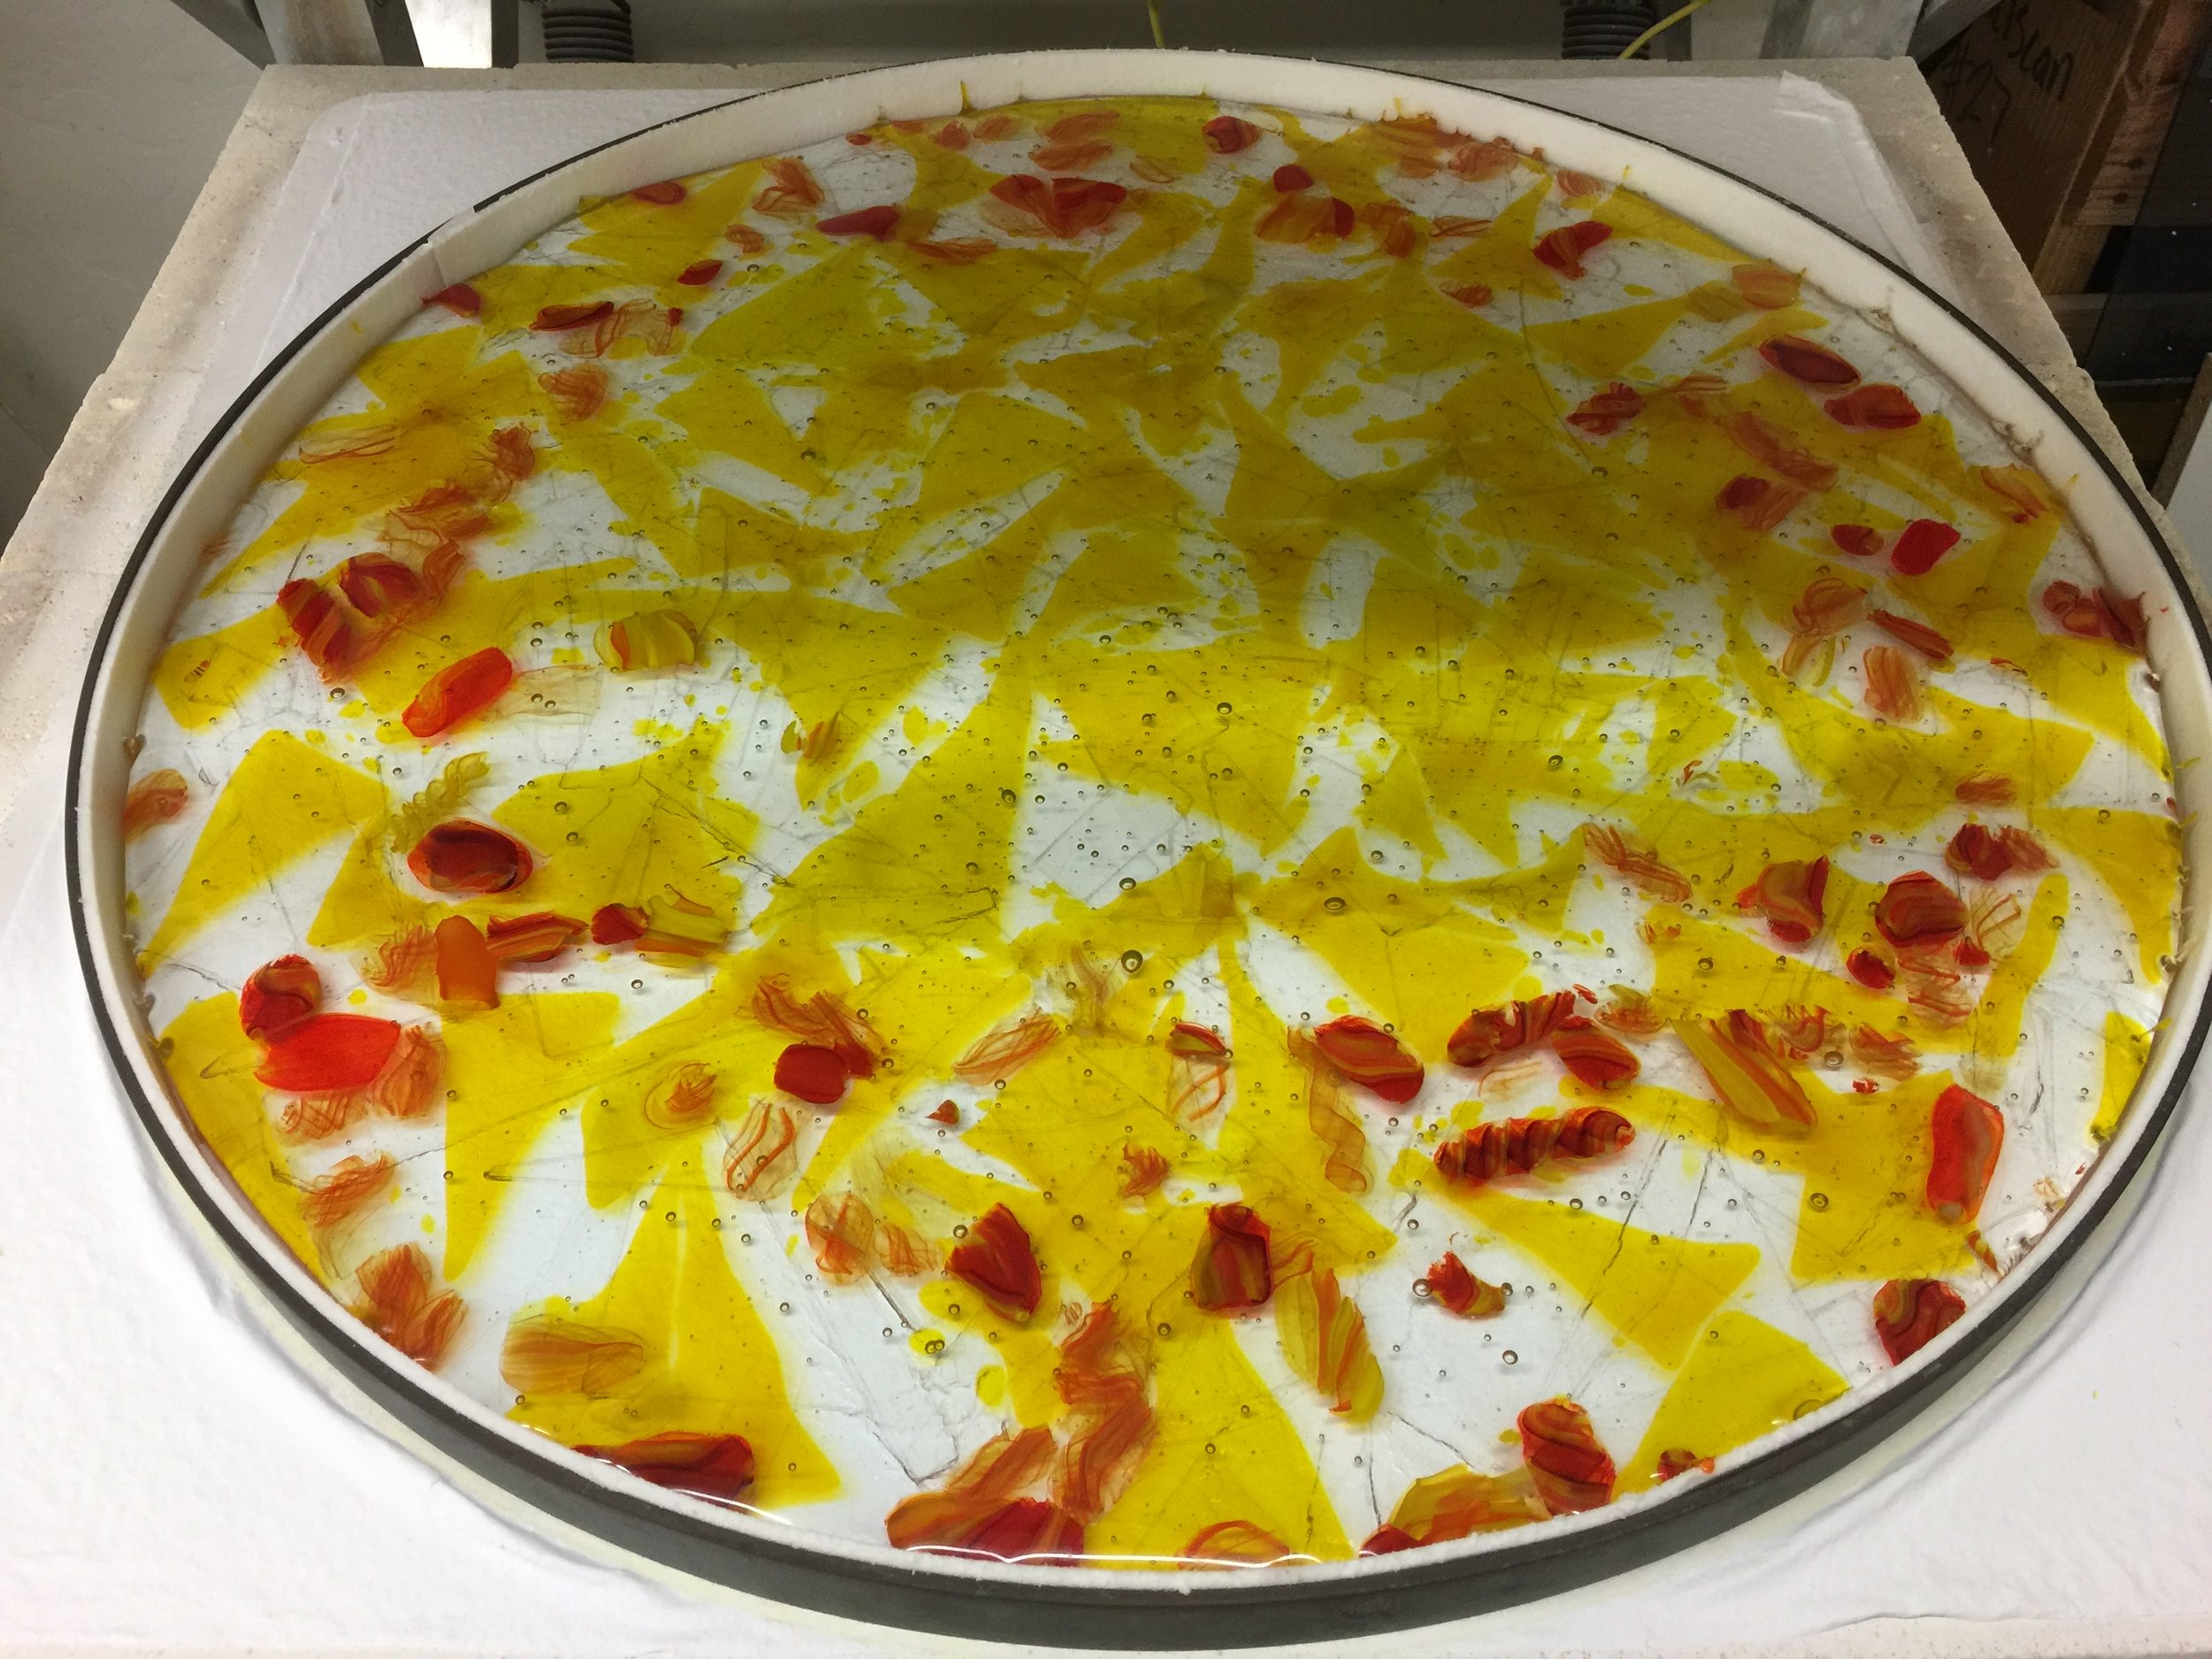
Here is the blue green piece after the first firing. I am not sure where it is going yet. I will post a finished picture here after firing again. That is part of the fun of doing these. Not only do you use a large amount of scrap but you also can let your creative juices fly after you see all that glass melted.

Schedules!!!
I am firing 96 Spectrum and Wissmach in these melts. If you are firing COE 90 just anneal at 900 and hold at the top fusing longer. (You will have to find that magic number for your kiln. a hot full fuse)
First firing….all scrap…..no base glass
You can go fast using scrap!!
450/1225/30
500/1480/30 You can adjust after seeing your results. If not smooth add time not temp!
9999/960/4 hrs (I anneal these extra long as I do not weigh the glass and do not know how thick they will end up)
100/600/0
Second firing - to add more color if needed or refine the look
This is also a chance to fix anything you do like. If there is a bubble at the surface drill it out with a dremel if it bothers you. Wash it out well before the next firing. If you love it now, as it is, clean up the edges and do a final firing out of the ring. This will round out the edges and fix any imperfections. This schedule would be:
100/800/0 slow as it is now thick and a solid mass - no need for a bubble squeeze
350/1460/10 (this temp will depend on your kiln, if you have added glass and if you have any drilled holes with chips over them) For a total remelt go 1480/20
9999/960/3-4 hrs depending on thickness
100/600/off
a quick peek at 200 but then leave until room temp.
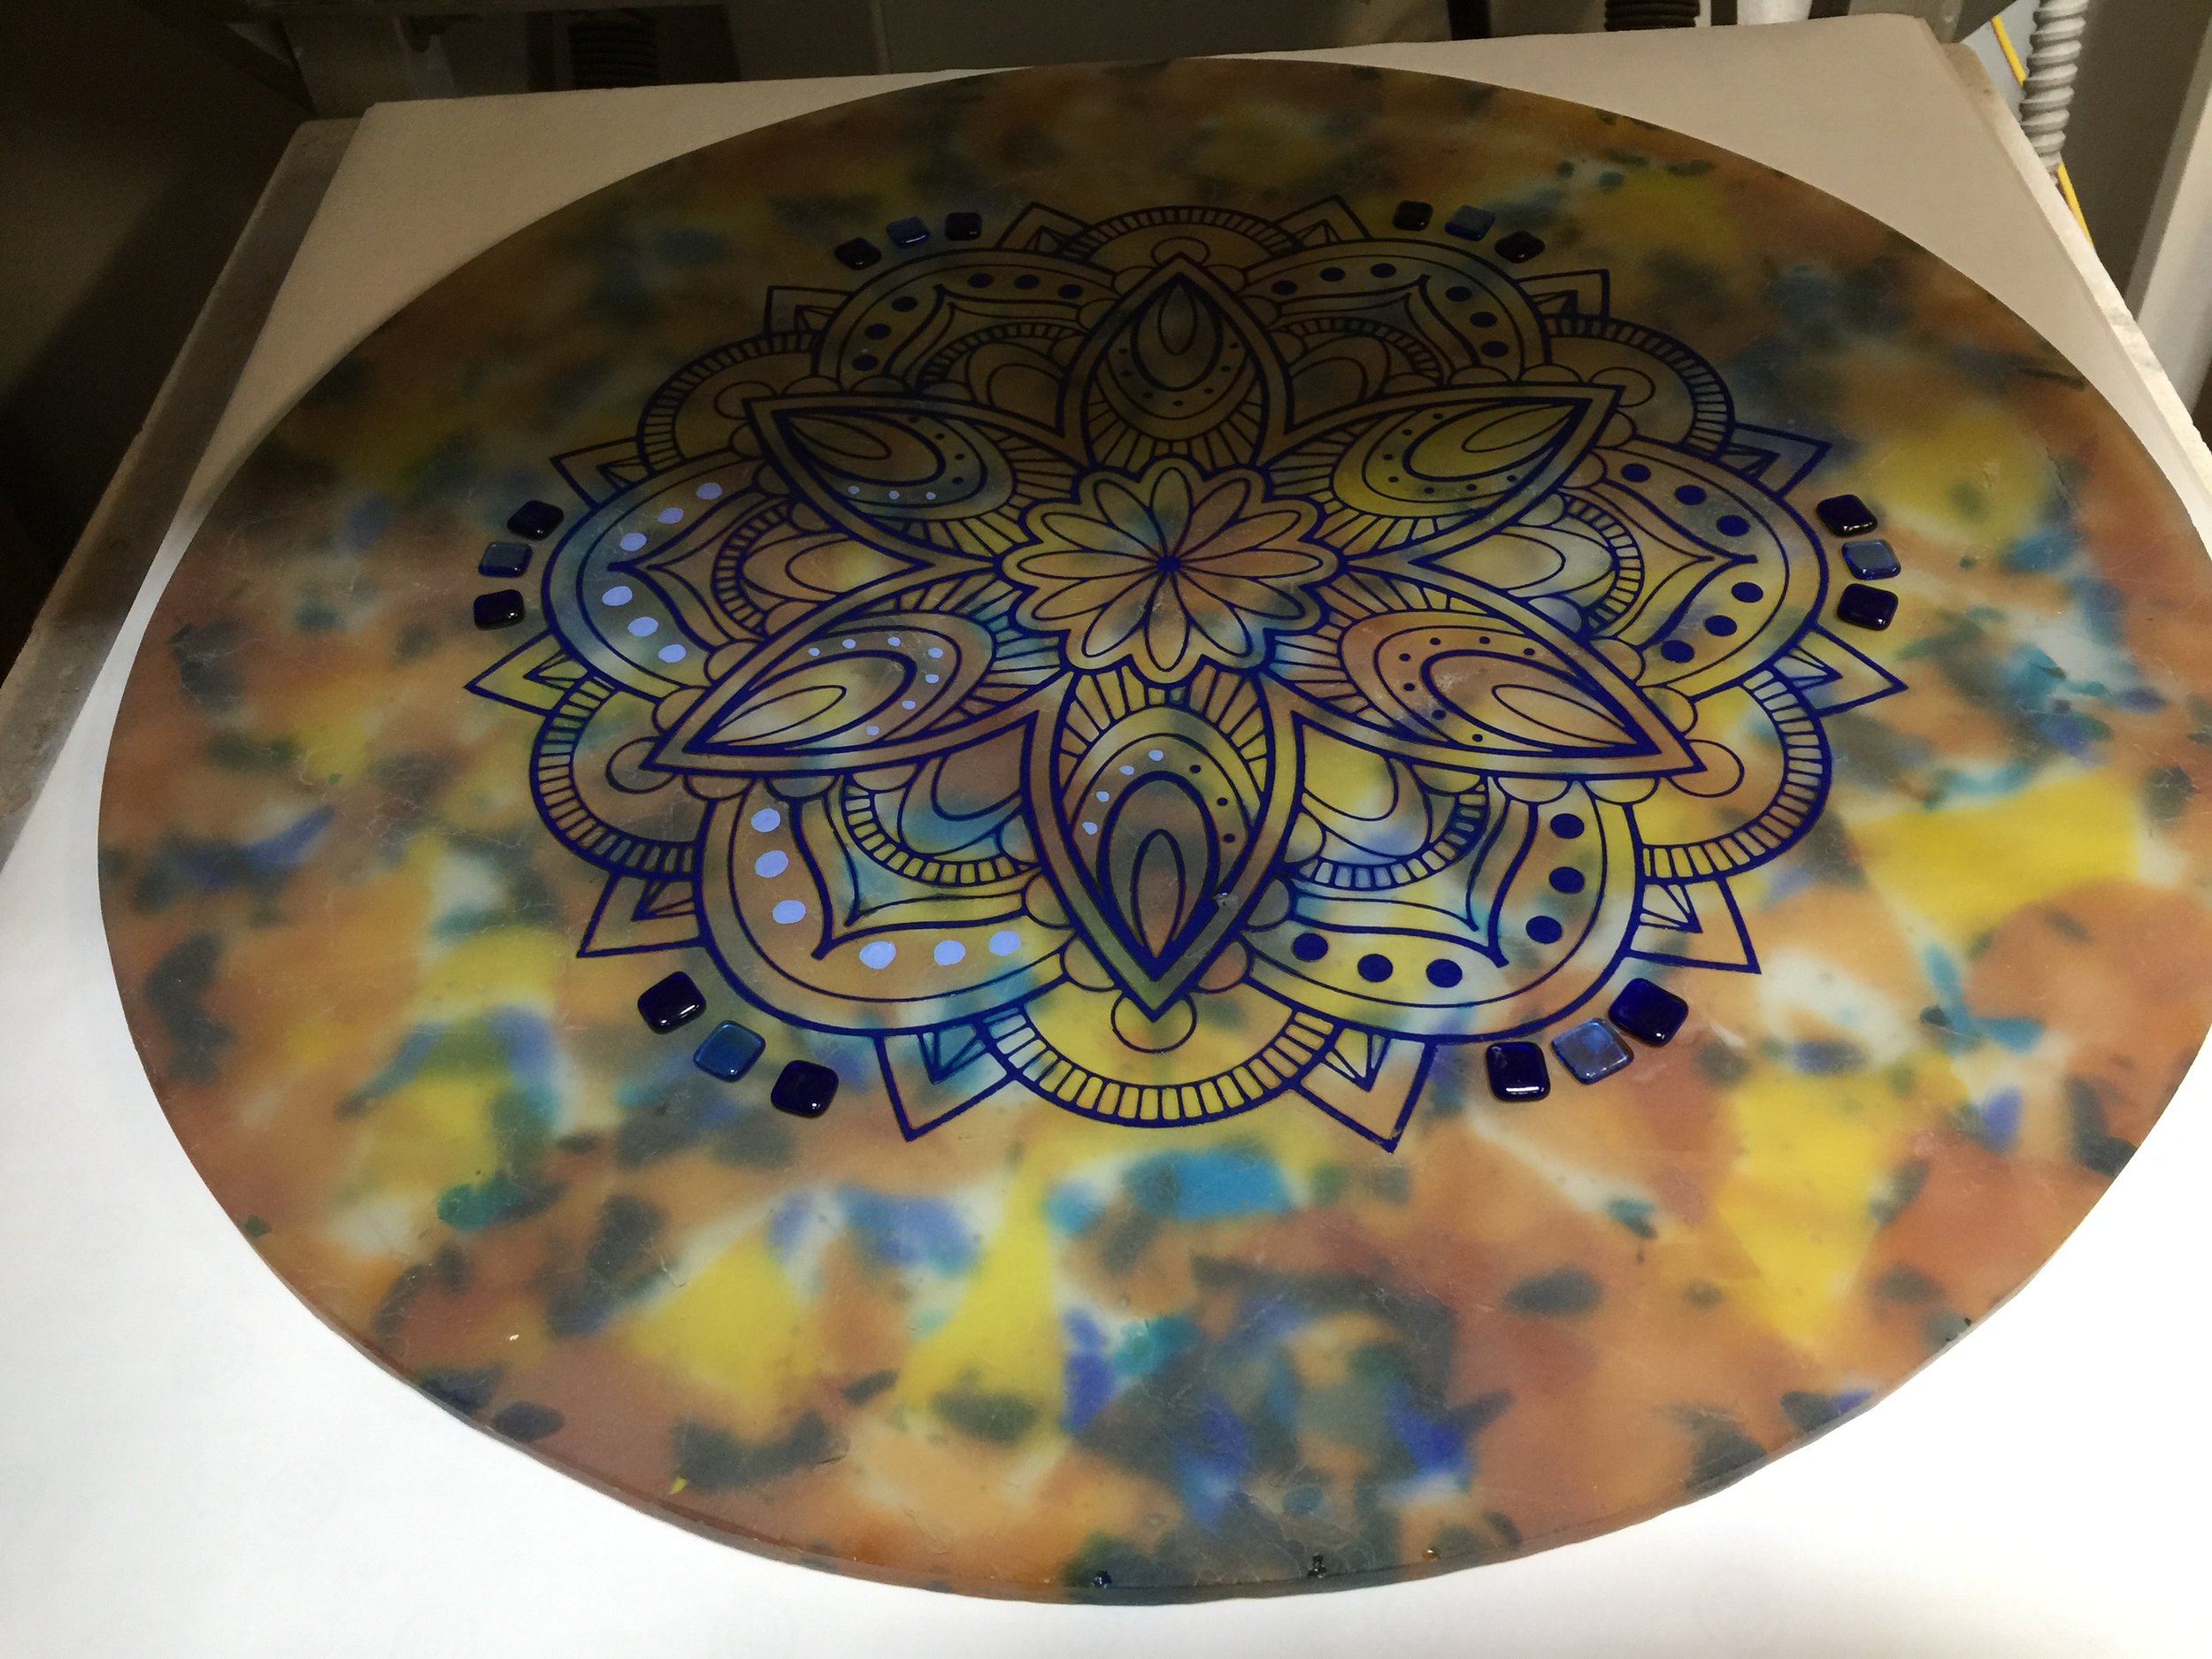
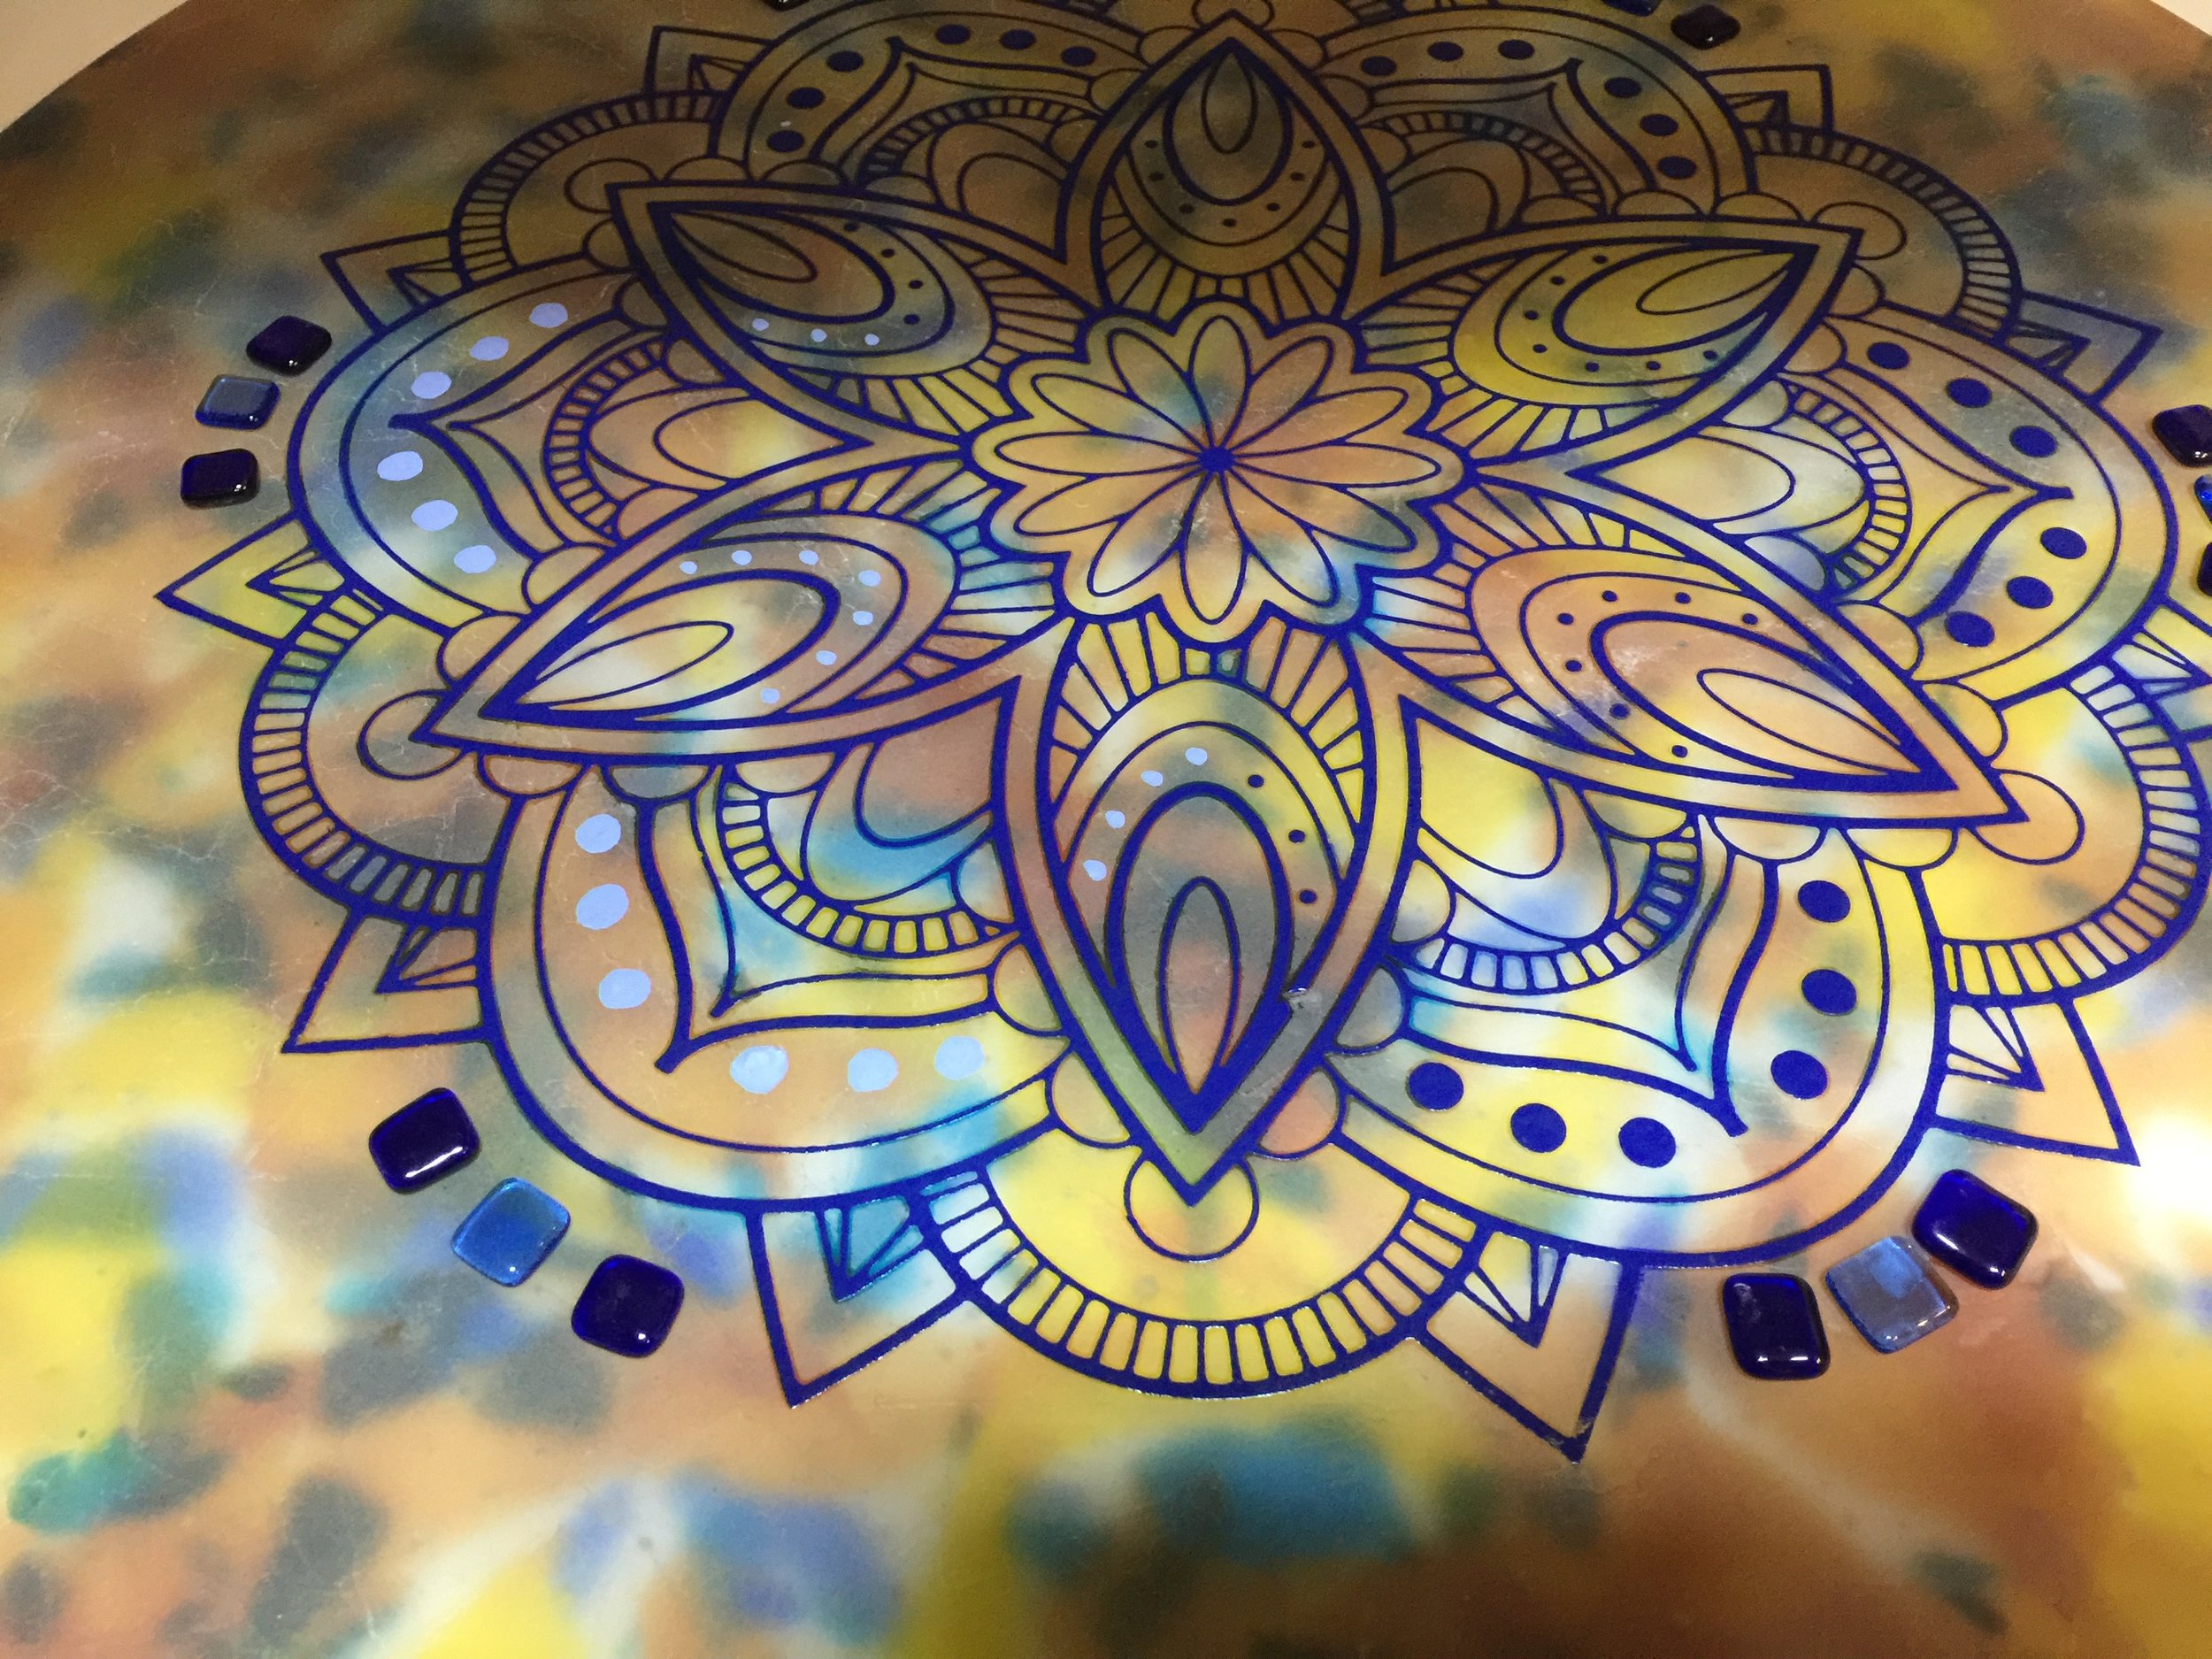
Additional Firing for Painted Design
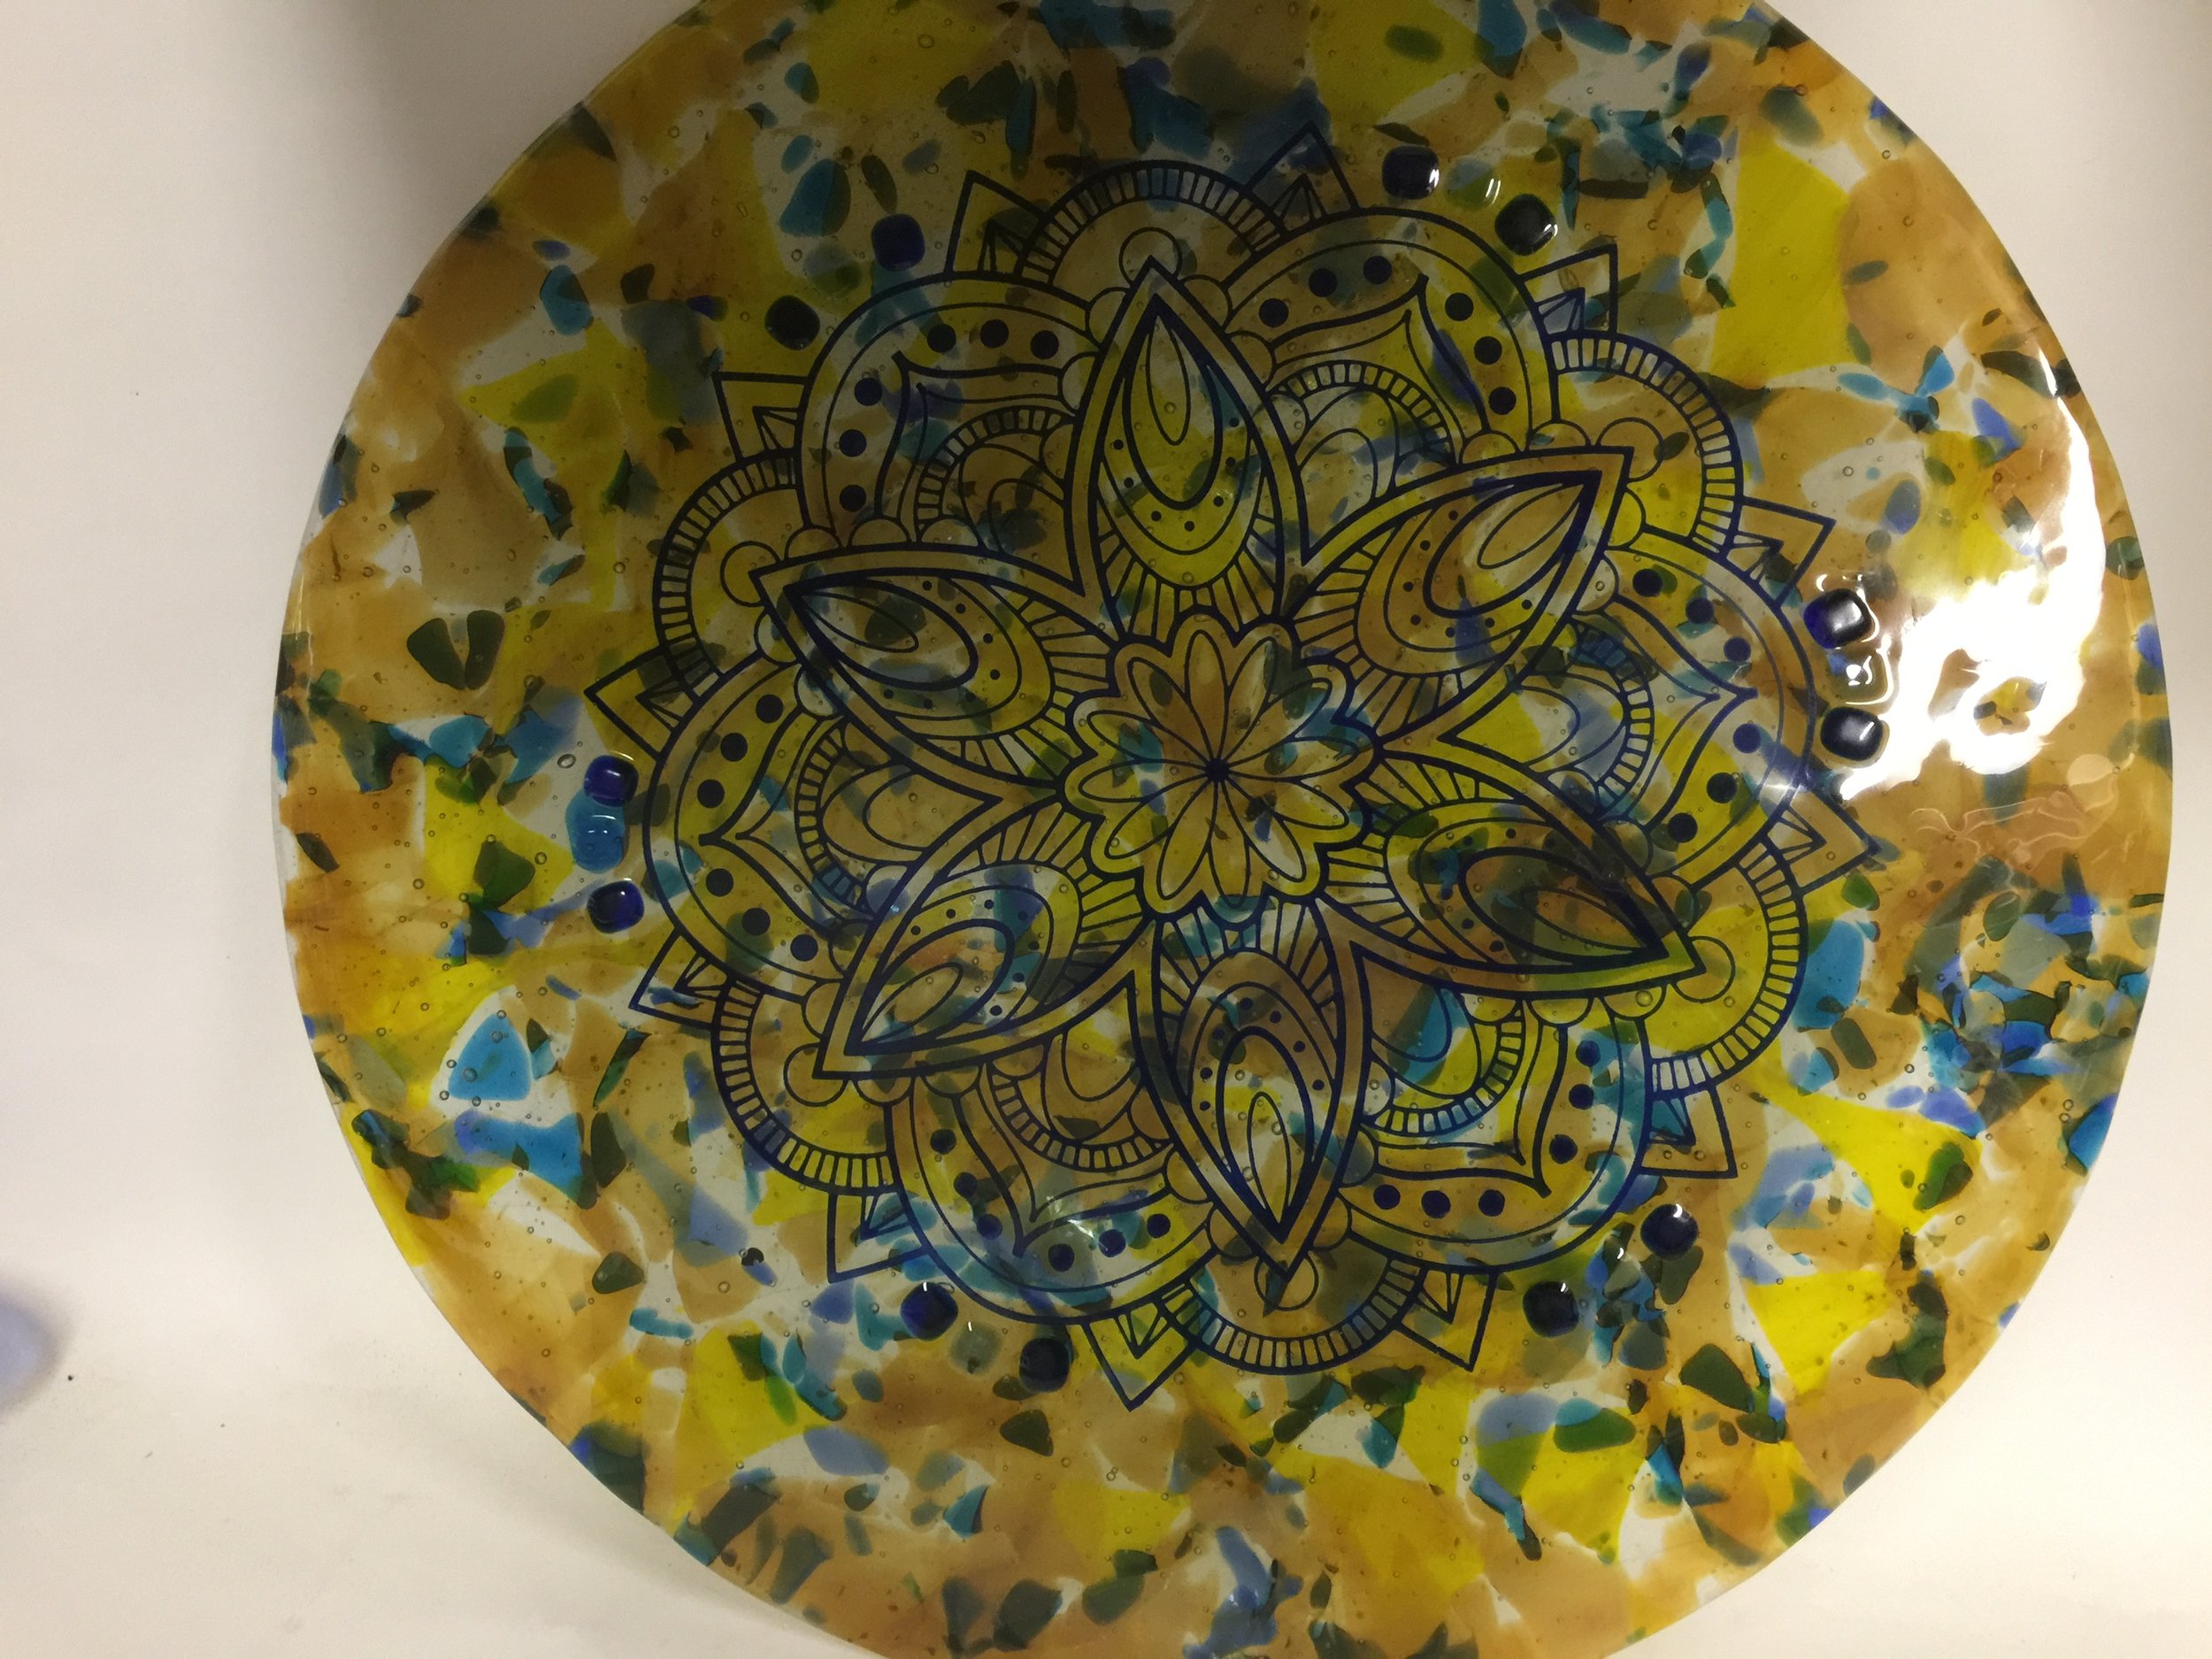
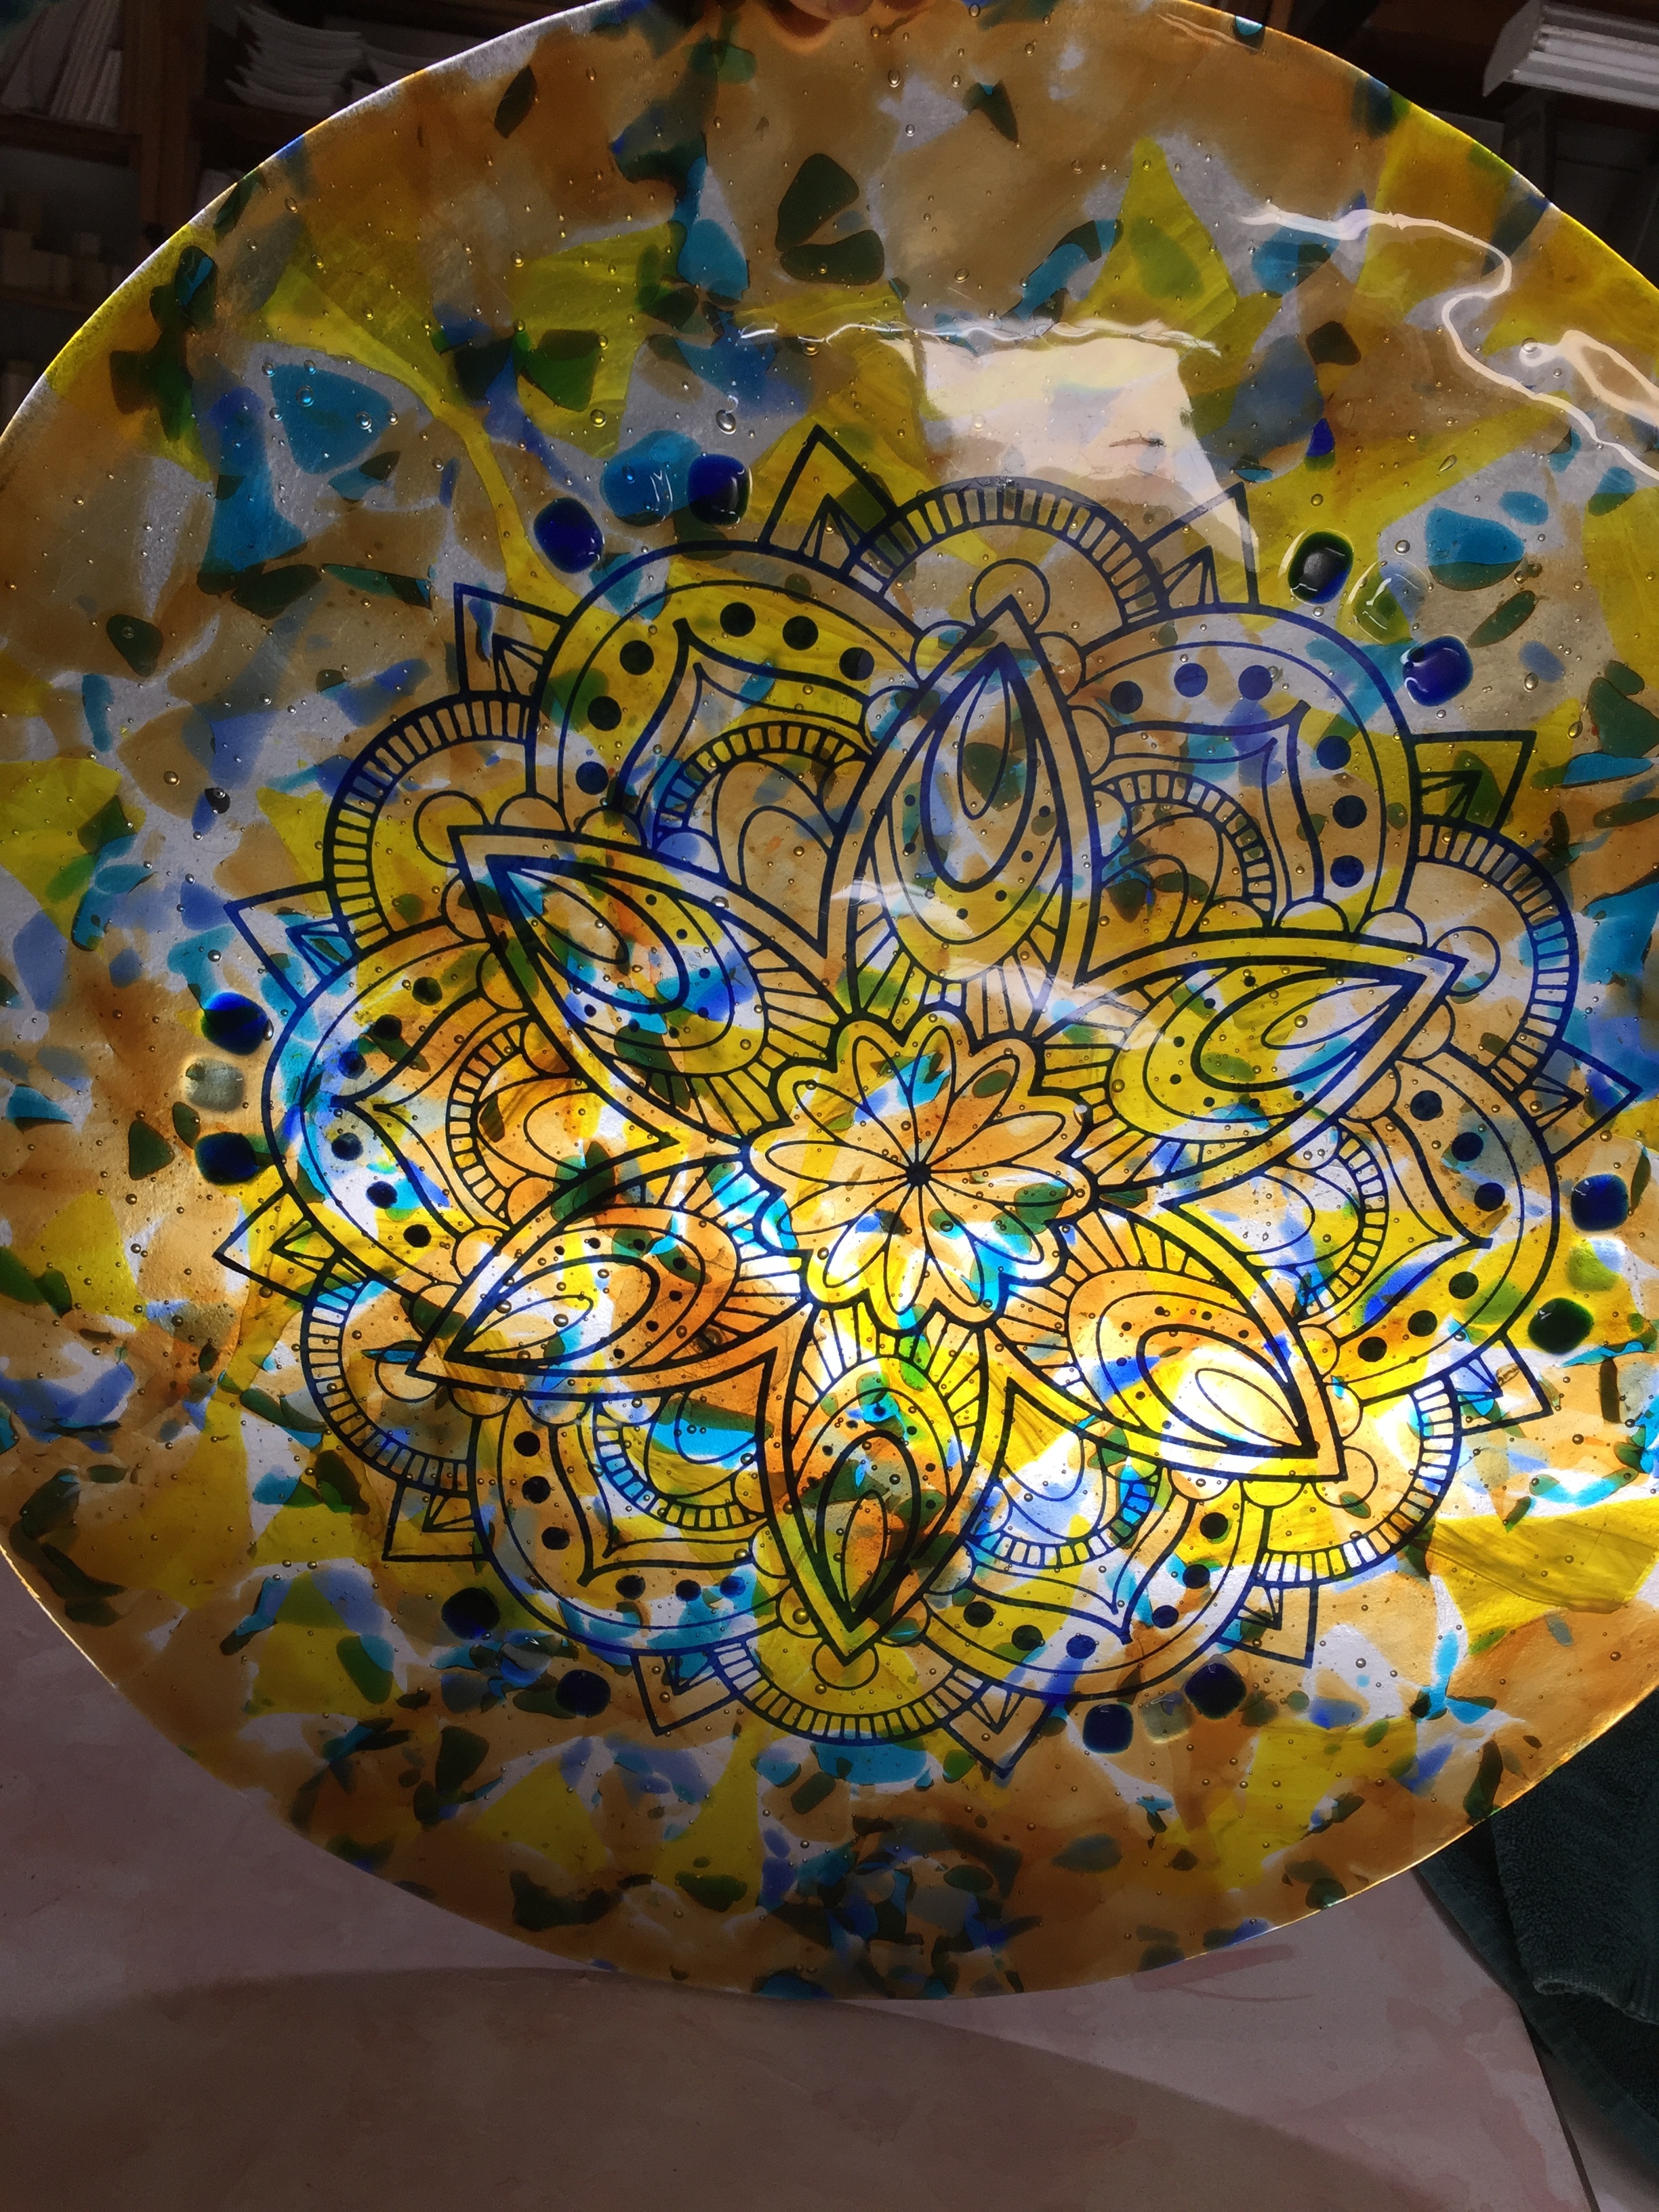
Last but not least!! This one I fired twice….the initial melt and then a full fuse out of the ring. i then decided to use EZ Enamels on it. on this firing I only needed to go to 1300 to set the enamels. Can’t wait to get this one in the sun in a large stand!
Schedule for setting EZ Enamel on these large pieces
100/800/0
450/1300/0
9999/960/3 hrs
100/600 off